
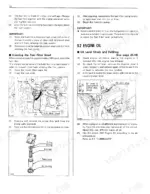
Covering the F2000 Front Mower from break-in through long-term seasonal storage, this Kubota Operator Manual (OEM #7661762110) runs 52 pages built for one machine. Seven of those pages walk through the instrument panel and controls: every switch position, gauge reading, and lever function, from the hour meter and coolant temperature gauge to the differential lock pedal and PTO gear shift lever. The rest brings a structured maintenance checklist, fluid capacities for each system, 3 pages of troubleshooting charts across engine, mower, and battery faults, and a full wiring diagram tracing each harness circuit. Fill the crankcase to 3.3 U.S.qts. (3.1L), torque the rear wheel lug nuts to 88.3 N·m (65 ft·lbs), clean the fuel filter every 100 hours. Stop hunting specs across dealer printouts and forum threads. Bookmarked and keyword-searchable, so any procedure surfaces in seconds on your phone or tablet at the machine.
What's Inside This Kubota F2000 Operator Manual
| System | Pages | Key Topics |
|---|---|---|
| Safe Operation | 7-10 | Before Operating The Front Mower, Operating The Front Mower, Stopping The Front Mower, Using The PTO, Using The Lift Link, Servicing The Front Mower |
| Servicing of Front Mower | 11 | Front Mower Product Identification Number, Engine Product Identification Number, Kubota F2000 |
| Specifications | 12 | Specification Table (Model, Engine, Capacities, Tires, Traveling Speeds, Dimensions, Weight, PTO Shaft, Front PTO, Clutch, Steering, Transmission, Min. Turning Radius, Brake, Differential) |
| Operating New Front Mower | 13 | Do Not Operate the Front Mower at Full Speed for the First 100 Hours, Changing Lubricating Oil for New Front Mowers, Engine Break-in, Machine Break-in, Read Safe Operation |
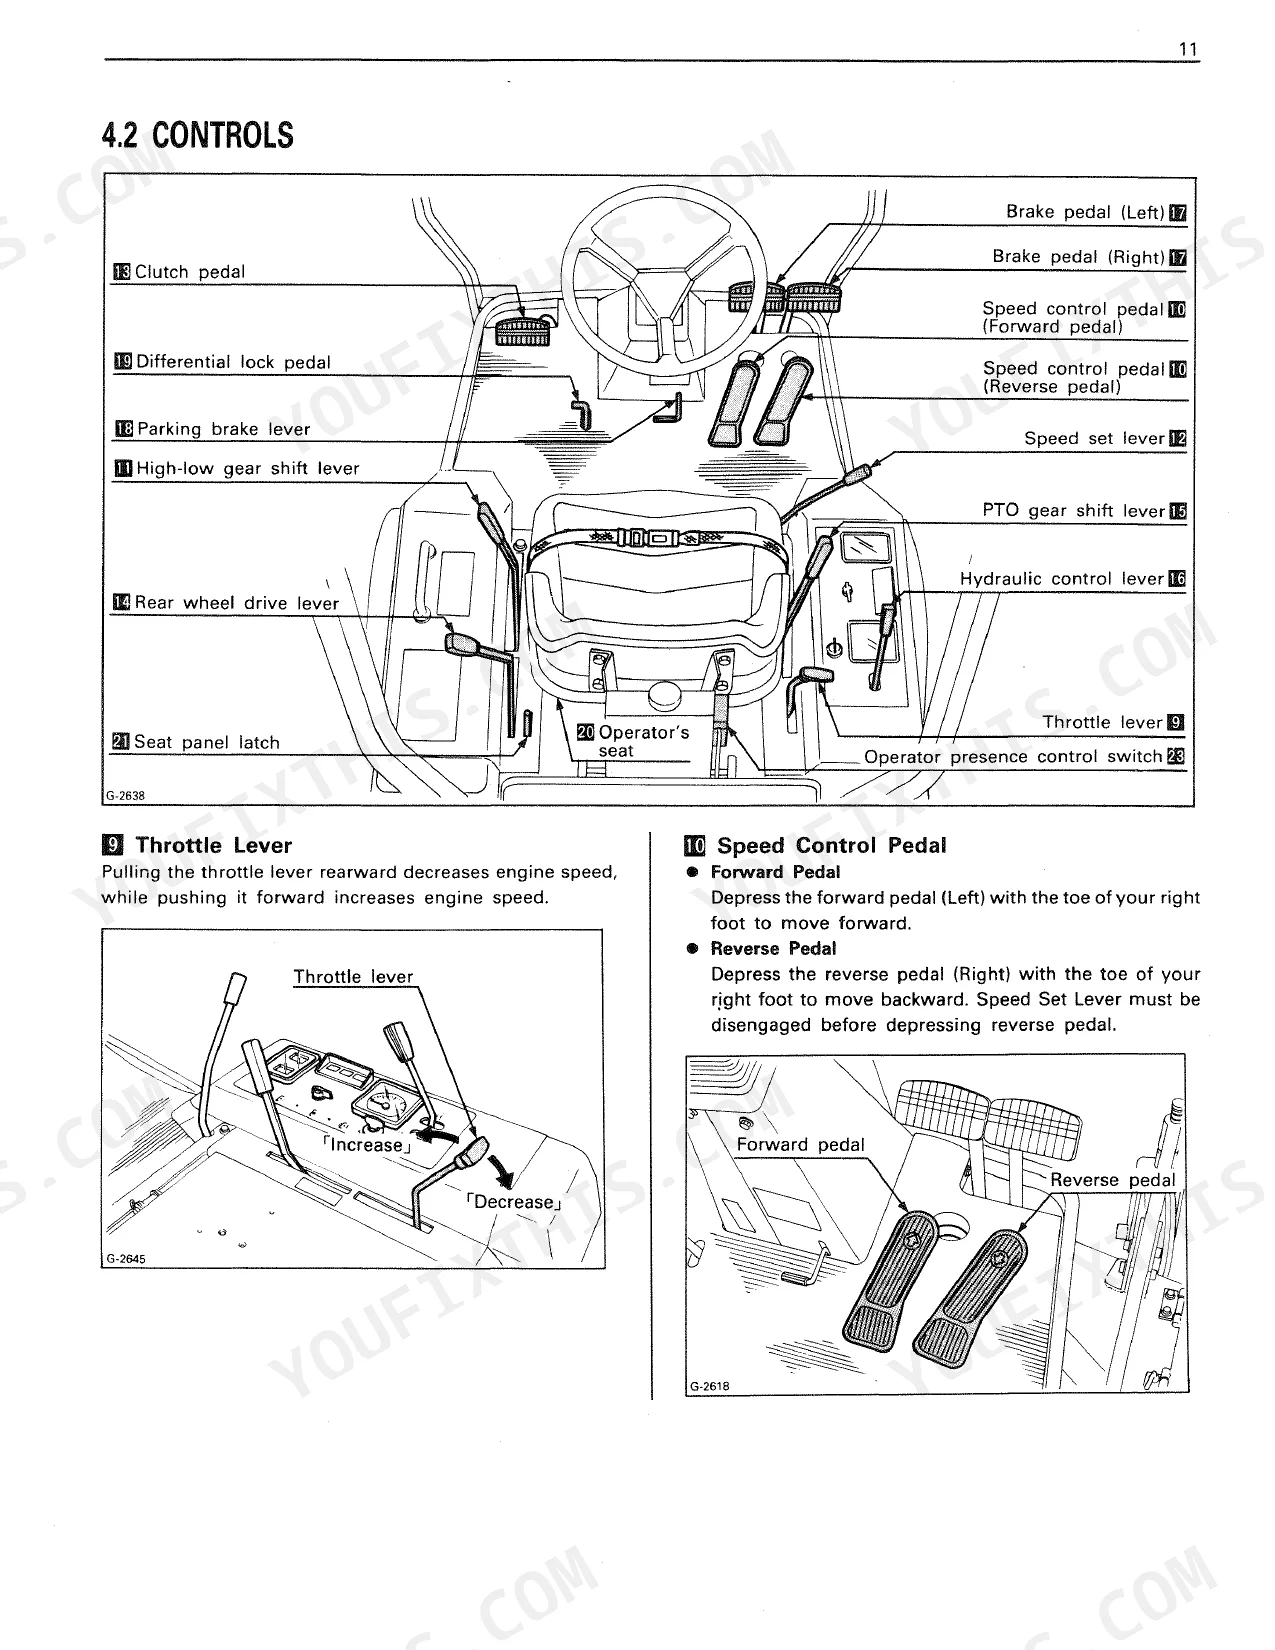
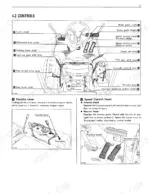
| Instrument Panel and Controls | 14-20 | Switches (Key Switch, Engine Oil Pressure Light, Coolant Temperature Gauge, Fuel Gauge, Battery Charge Light, Hour Meter/Tachometer, Head Light Switch, Engine Stop Knob) |
| Lift Link and Hydraulic Control | 21-22 | Lifting Rod, Lift Link, Implement Lowering Speed Control |
| Wheels, Tires and Ballast | 23-24 | Wheel Adjustment, Tires, Ballast, Toe-In |
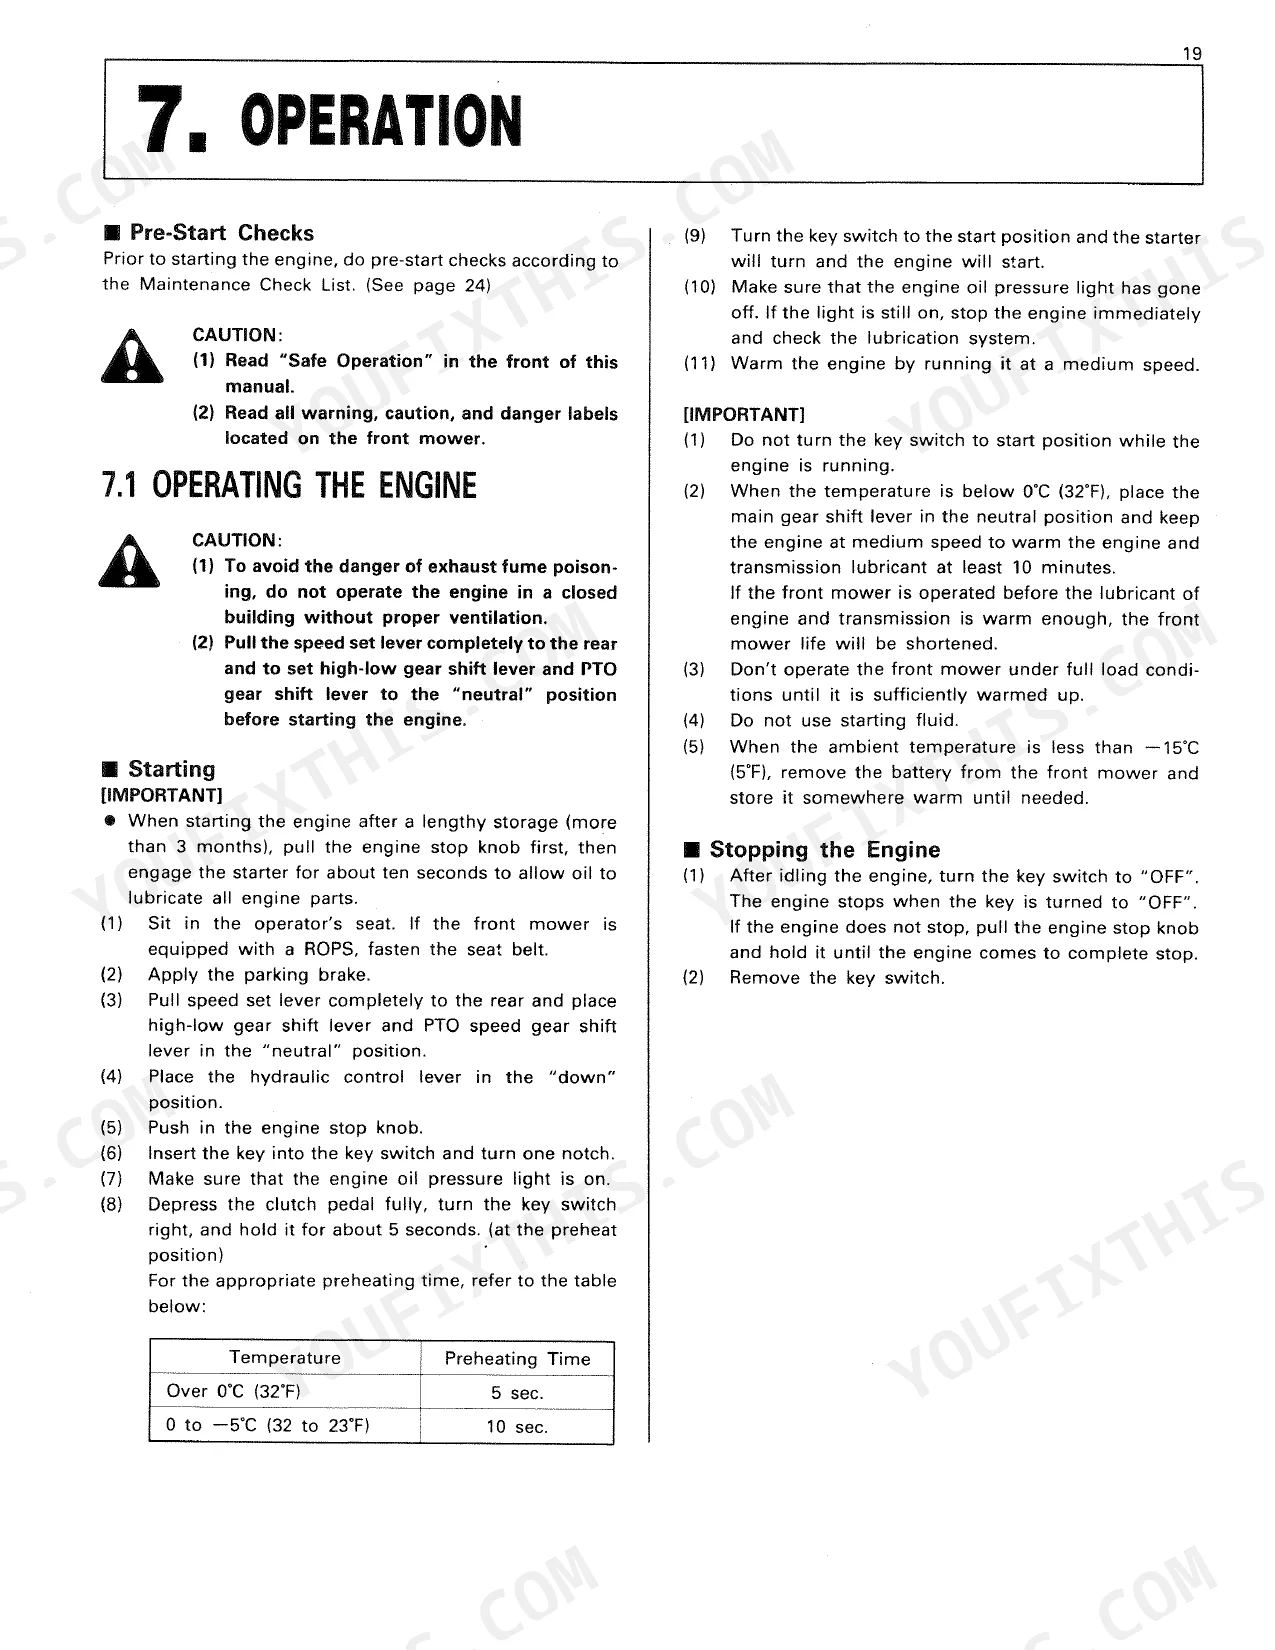
| Operation | 25-28 | Operating the Engine, Operating the Front Mower, Check During Driving |
| Maintenance | 29-30 | Daily Check, Lubricants, Maintenance Check List |
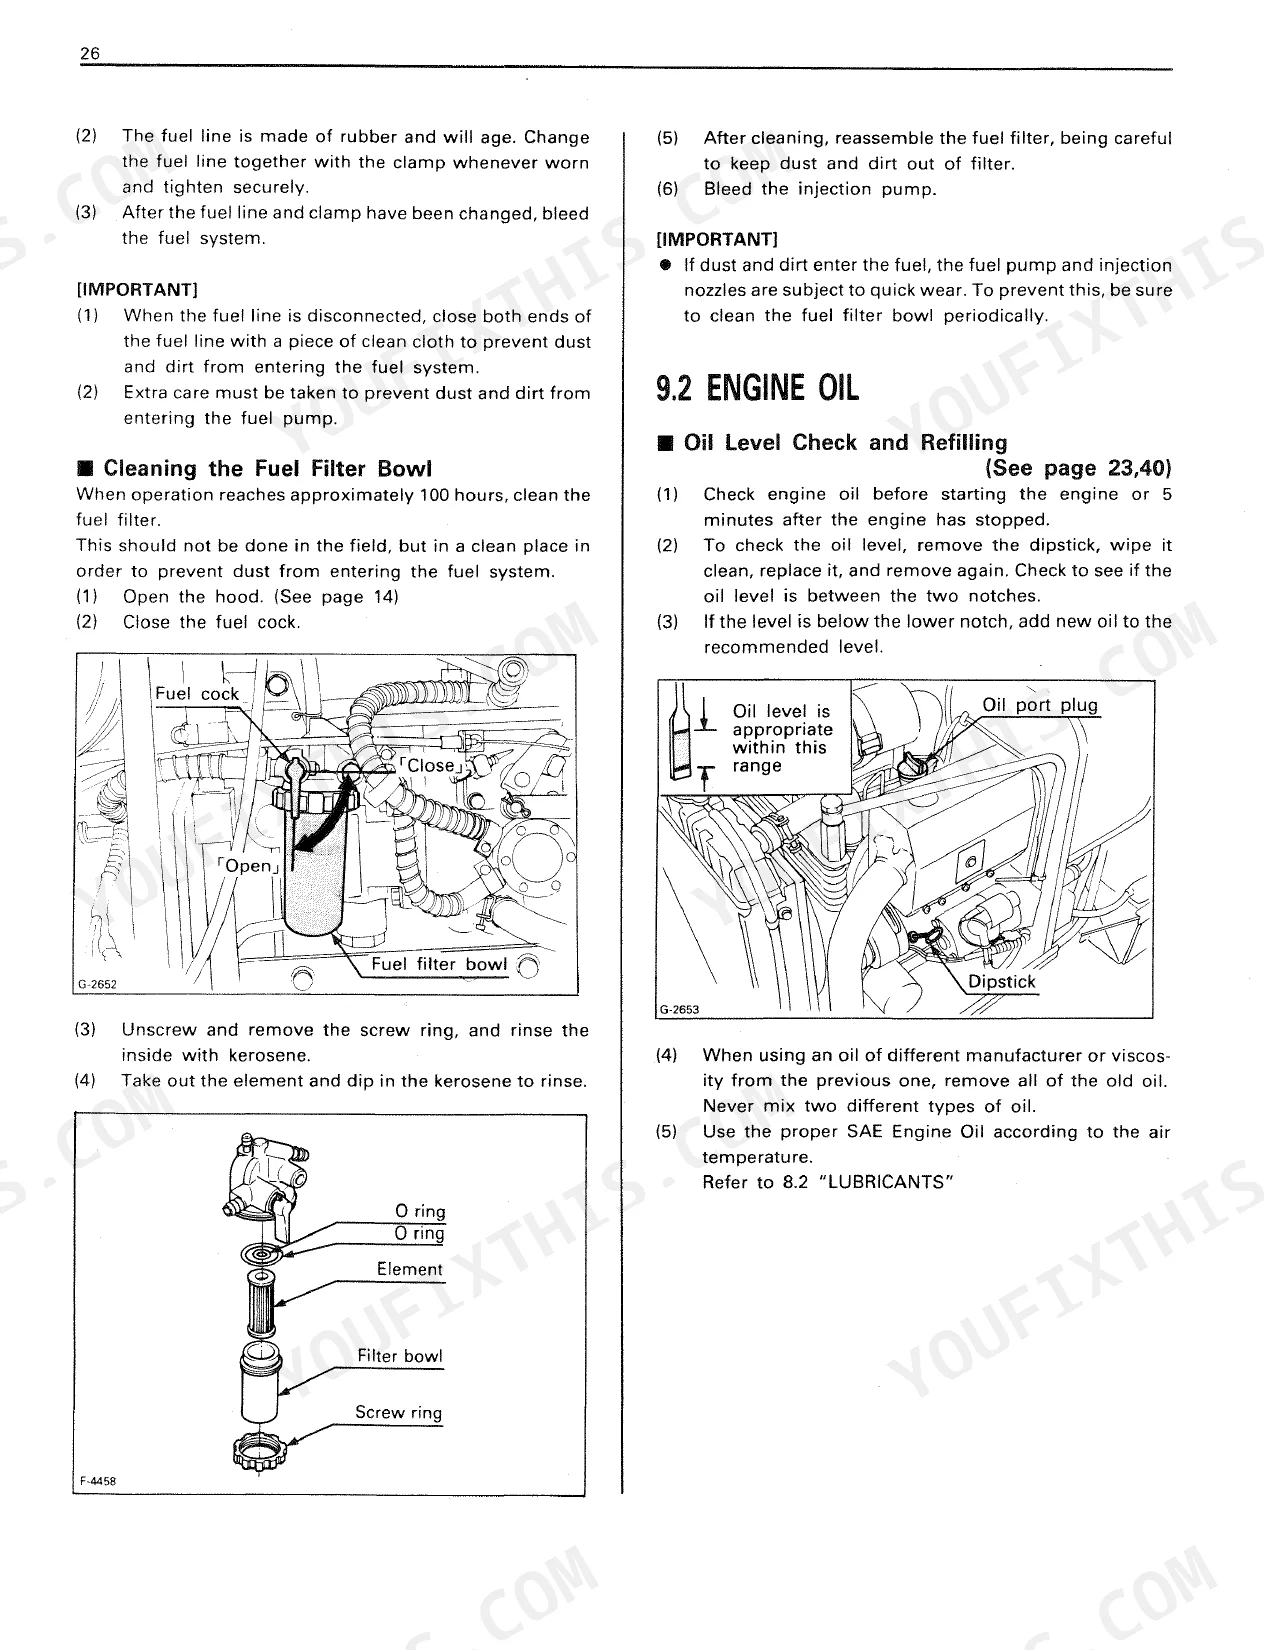
| Check and Maintenance | 31-40 | Fuel, Engine Oil, Air Cleaner, Cleaning Air Filter Element, Battery, Transmission Fluid, Fuse, Changing Rear Axle Differential Case Oil |
| Adjustments | 41 | Fan Drive Belt, Clutch, Brake |
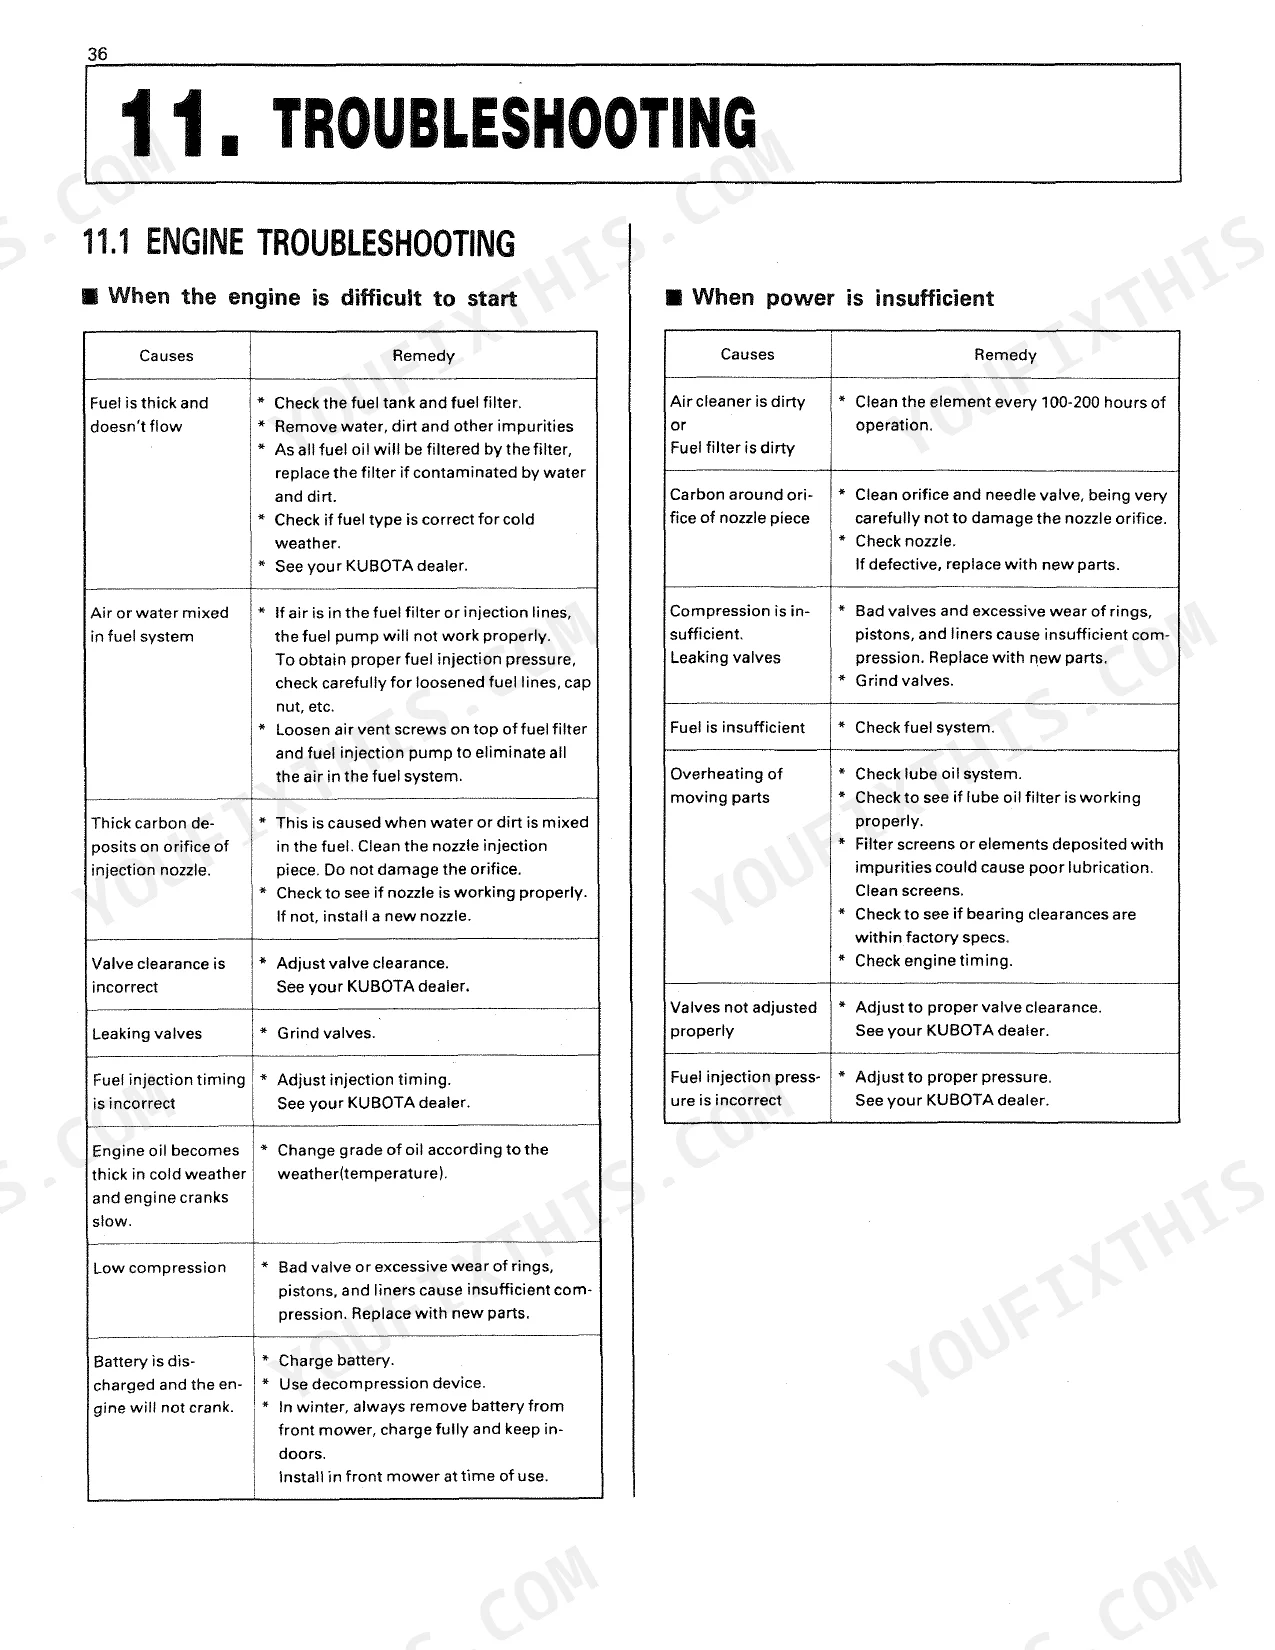
| Troubleshooting | 42-44 | Engine Troubleshooting, Front Mower Troubleshooting, Battery Troubleshooting |
| Long-Term Storage | 45 | Directions for Storage, Maintenance Free Type Battery Charging |
| Lubricant Specifications | 46 | Engine Oil (Viscosity Chart), Transmission Oil, Others, Kubota Lubricants |
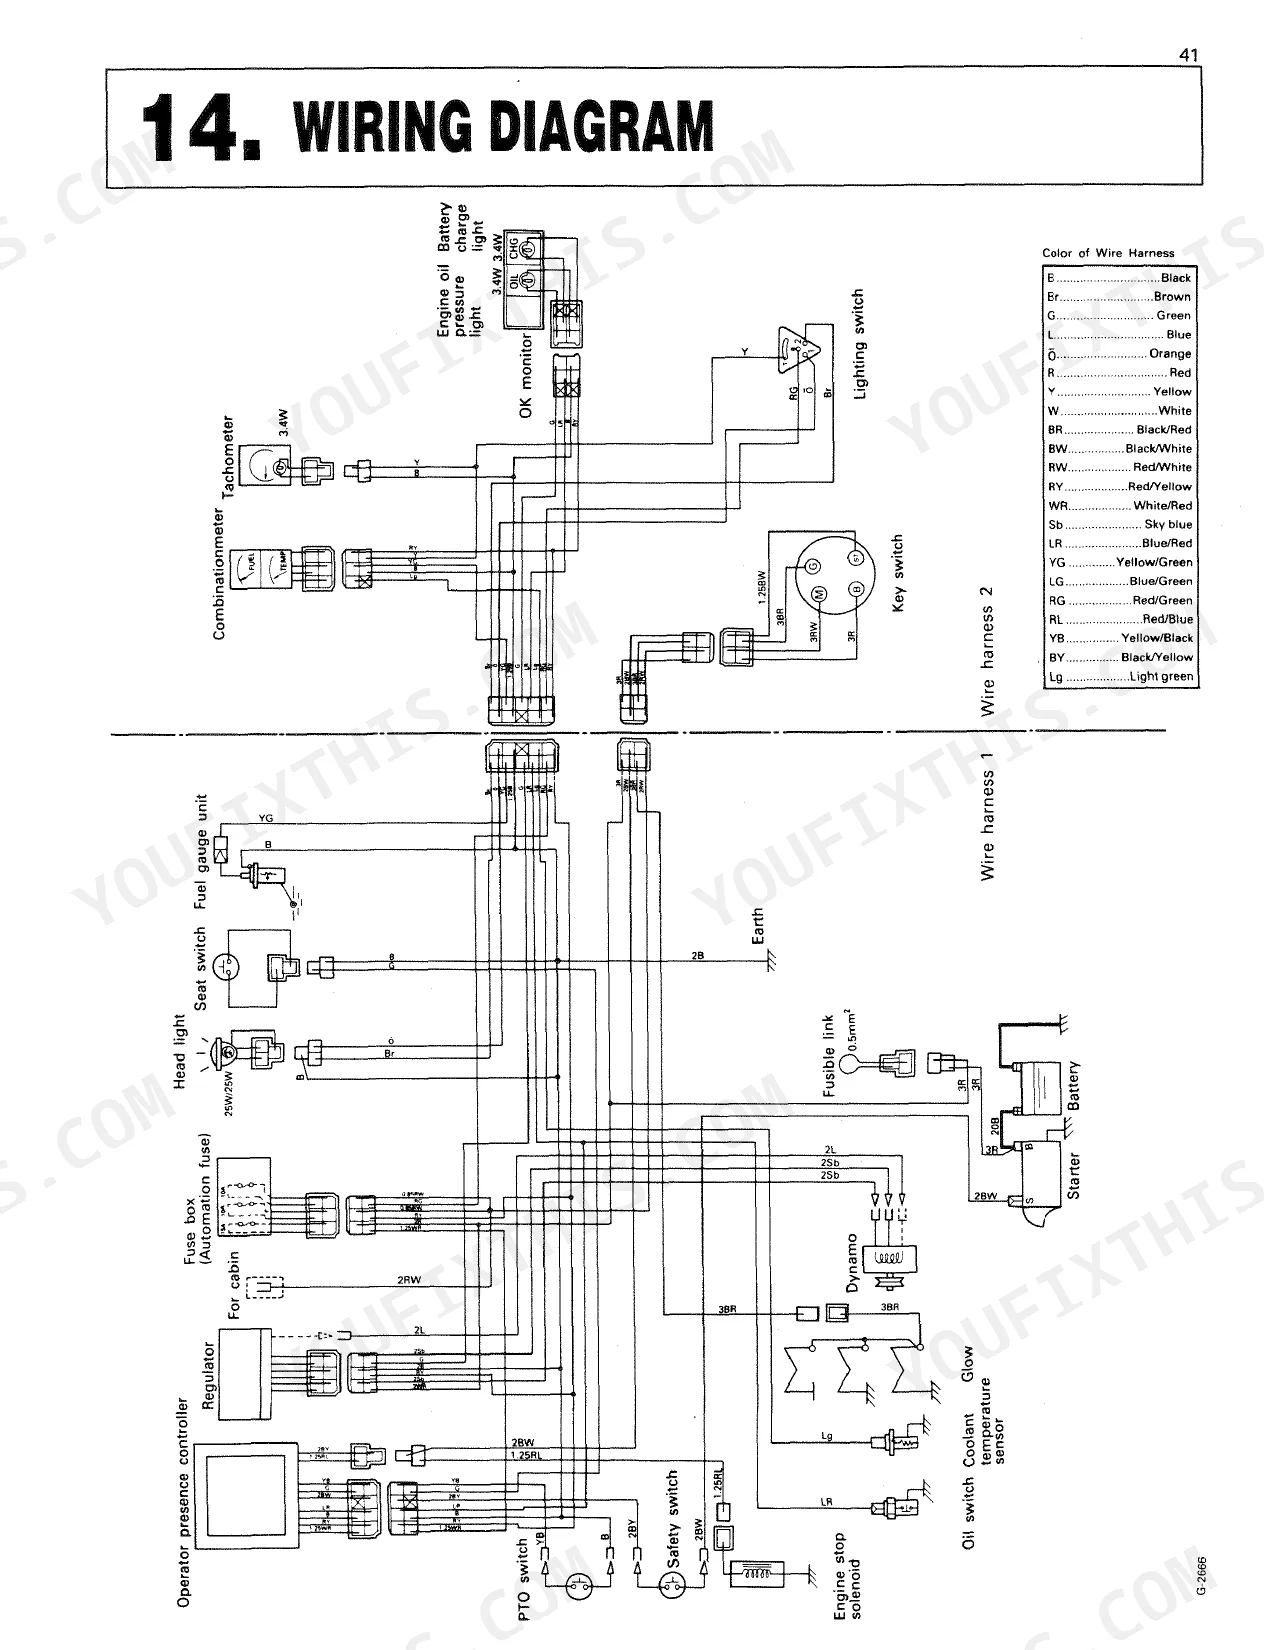
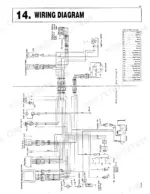
| Wiring Diagram | 47 | Color of Wire Harness, Head Light, Seat Switch Fuel Gauge Unit, Combinationmeter Tachometer, Engine Oil Battery Pressure Charge Light, OK Monitor, Lighting Switch, Key Switch |
Quick Reference Specifications
| Specification | Value | Page |
|---|---|---|
| Front wheel lug nut torque | 49 N·m (36 ft·lbs) | p. 23 |
| Rear wheel lug nut torque | 88.3 N·m (65 ft·lbs) | p. 23 |
| Fuel filter cleaning interval | Every 100 hours | p. 32 |
| Fuel filter change interval | Every 400 hours | p. 30 |
| Engine crankcase oil capacity | 3.3 U.S.qts. (3.1ℓ) | p. 29 |
| Engine oil change interval | Every 75 hours | p. 30 |
| Transmission fluid capacity | 13.4 U.S.qts. (12.7 ℓ) | p. 29 |
| Transmission oil filter cartridge change interval | Every 200 service hours | p. 34 |
| Engine gross power | 20 HP | p. 12 |
| Fuel tank capacity | 9.0 U.S.gals. (34ℓ) | p. 12 |
| Transmission case fluid capacity | 13.4 U.S.qts. (12.7ℓ) | p. 12 |
| Rear tire pressure | 200kPa (28psi) | p. 24 |
Kubota F2000 Common Problems This Manual Covers
Kubota F2000 electrically dead after battery replacement, no crank and no start p. 42
Check battery terminals for corrosion and looseness; clean and retighten both cable ends. Verify the seat switch is fully engaged and the brake pedal is depressed (free travel: 0.4 to 0.8 in / 10 to 20mm, page 41). If the machine still won't crank, trace the ignition path using the wiring diagram on page 47.
Manual Section: Battery and Electrical Starting IssuesEngine cranks but won't fire or runs rough immediately after fuel filter service p. 31
Prime the fuel system by cranking in short bursts until the engine catches; air trapped after filter work is the usual culprit. Replace the fuel filter every 400 hours per the maintenance schedule on page 30. Once running, let the engine idle for several minutes and verify the fuel gauge on page 14 reads a stable level.
Manual Section: Engine Starting IssuesFront hydraulic lift operates erratically or feels sluggish after transmission fluid service p. 34
Verify the transmission fluid level is correct at 13.4 U.S.qts. (12.7 L) per the capacities table on page 29. Operate all hydraulic functions through their full range several times to purge trapped air from the circuit. Recheck the fluid level after cycling; top off as needed to the correct mark.
Manual Section: Lift Link and Hydraulic Control IssuesSpeed control lever or cruise position does not hold, mower drifts or surges unpredictably p. 17
Inspect the speed control lever at the operator station on page 17 for visible play or looseness at the pivot. Verify all accessible lever hardware is tight. If the pedal or lever continues to drift, check transmission fluid level against the 13.4 U.S.qts. (12.7 L) capacity on page 29 before operating further.
Manual Section: Lift Link and Hydraulic Control IssuesEngine oil pressure light or battery charge light illuminates during normal operation p. 14
Stop operating immediately if the oil pressure light comes on; check the engine oil level against the 3.3 U.S.qts. (3.1 L) crankcase capacity on page 29. For a battery charge light, verify the alternator belt is intact and connections are clean. Review the indicator descriptions on page 14 to confirm which warning requires immediate shutdown.
Manual Section: Instrument Panel and ControlsFrequently Asked Questions
How do I reset the hydrostatic drive on a Kubota F2000?
If the mower creeps while the speed control pedal sits released, the hydrostatic control linkage is out of adjustment. This is not a user-resettable function, so you'll need to contact your dealer for hydrostatic linkage or pressure adjustment. The manual's troubleshooting section covers this condition.
What are the torque specs for Kubota F2000 wheel bolts, blade bolts, and deck hardware?
Front wheel lug nuts torque to 49 N·m (5 kgf·m, 36 ft·lbs); rear wheel lug nuts to 88.3 N·m (9 kgf·m, 65 ft·lbs). The manual lists no separate torque values for blade bolts or deck hardware.
Why does my Kubota F2000 not move or lose drive?
When the engine runs but the F2000 won't move, the usual causes are a high-low gear shift lever left in neutral, an engaged parking brake, or low transmission fluid. Check the lever position, release the parking brake, and top off the transmission fluid if it's low.
What error codes or warning lights does the Kubota F2000 use?
Rather than error codes, the F2000 relies on warning lights: an engine oil pressure light, a battery charge light, and a coolant temperature gauge that flags overheating once the needle hits the "H" setting (red zone). The manual mentions no diagnostic codes.
How quickly can I access this Kubota F2000 manual after buying?
Immediate download of the complete 52-page searchable Operator Manual. Open it on any device, whether that's a laptop at your desk or a phone in the field.
Can I print specific sections of this Kubota F2000 Operator Manual?
Absolutely. No DRM or copy protection. Print the whole manual or just the pages you need. Any home or office printer works.
Are electrical wiring diagrams included in this Kubota F2000 Operator Manual?
Yes. The manual includes a wiring diagram on page 47 showing the engine electrical layout. It is an operator-level diagram, not full workshop electrical schematics.
Document Quality
This document is a scanned PDF with an OCR layer, allowing you to search and copy text throughout the manual. The text is generally crisp and easy to read, with no noticeable blurriness or fading. Diagrams and illustrations are raster images, but their labels are clear and readable, providing sufficient detail for understanding. Pages are clean with a white background, free from significant scan artifacts or marks, though some pages (2, 6, 50, 51) are intentionally blank.


Reviews
There are no reviews yet.