


Part of the JCB Operator Manuals.
Before you put your backhoe loader to work, this 430-page JCB Midi CX operator manual PDF (OEM #9811/5300) breaks down exactly how to run and maintain your machine. Open to the controls section to master the SAE Plus and ISO servo patterns, then jump into a full routine maintenance breakdown covering every filter, belt, and grease point. Detailed dashboard indicator charts, safe lifting capacities, and step-by-step procedures for operating the three-point hitch are all in there. Top off the 11.9-liter cooling system and verify your wheel nuts are torqued strictly to 680 Nm before rolling onto the job site. Don't risk downtime by ignoring your daily service checks. Download this bookmarked file right to your tablet, walk out to the yard, and keep your loader running strong.
What's Inside This JCB MIDI CX Operator Manual
| System | Pages | Key Topics |
|---|---|---|
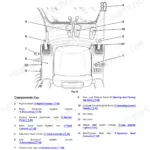
| Introduction & Safety Overview | 17-25 | Safety Warnings, Operator Manual, Machine Description, Cab/Canopy, Component List |
| Safety Information | 26-37 | General Safety, Operating Safety, Safety Label Identification |
| Machine Identification & Security | 38-64 | Component Identification Plates, Transmission Identification Numbers, ROPS/FOPS Certification Plate, JCB Plantguard, Construction Equipment Security and Registration Scheme (Cesar) |
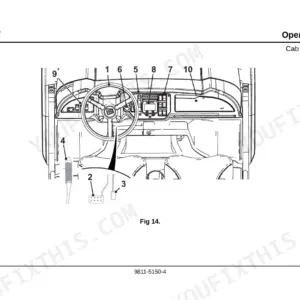
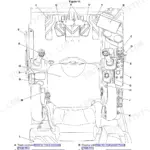
| Cab, Controls & Safety Equipment | 65-144 | Entering and Leaving the Cab, Seat Controls, Seat Belt, Loader Controls, Backhoe Controls, Servo and Manual Control Patterns, Boom and Slew Locks, Beacon, Fire Extinguisher Check |
| Starting & Pre-Operation Checks | 145-150 | Fuel System Priming, Park Brake, Walk Round Inspection, Forward/Reverse Lever, PTO Switch, Hand Throttle Lever, Starter Switch |
| Machine Operation & Travel | 151-200 | Road and Site Travel Position, Operating Practices, Accelerator and Brake Pedals, Filling the Loader Shovel, Loading a Truck, Attaching Equipment, Sway Links, Risk Assessment |
| Special Conditions, Transport & Storage | 208-228 | Operating in Low Temperatures or Dusty Areas, Filling the Tank, Towing and Retrieval, Trailer Preparation, Stabilisers, Crane Positioning, Lifting Points, Machine Storage |
| Routine Maintenance & Preparation | 229-268 | Service Requirements, Waste Disposal, Used Oil, Battery Safety, Toolbox, Loader Arm Safety Strut |
| Cleaning & Damage Inspection | 269-278 | Preparing the Machine for Cleaning, Check Machine Body and Structure, Seat Belt Check, Hydraulic Hoses and Fittings Check, ROPS/FOPS Structure Check |
| Lubrication & Chassis Servicing | 279-289 | Greasing Loader Arms, Backhoe, Front Axle, Stabilisers, Kingpost, Engine Cover Access Panel, Cab Heater Fresh Air Filter |
| Powertrain, Electrical & Hydraulic Servicing | 290-345 | Park Brake Adjustment, Battery, Fuses and Relays, Engine Oil and Filter Change, Cooling System, Fuel Filter, Hydraulic Tank and Suction Strainer, Differential and Hub Oil, Transmission Charge Pump Filter |
| Wheels, Washer, Fire Extinguisher & Attachments | 346-394 | Tyre Inflation, Wheel Nuts, Windscreen Washer Level, Fire Extinguisher Check, Hydraulic Hose Quick Release Couplings |
| Specifications, Warranty & Compliance | 395-430 | Safe Working Loads, Backhoe Bucket Weights and Dimensions, Static Dimensions, Hydraulic Hose Burst Pressures, Machine Service Record Sheet, Ec Declaration of Conformity |
Quick Reference Specifications
| Specification | Value | Page |
|---|---|---|
| Wheel Nut Torque | 680 Nm (500 lbf ft) | p. 349 |
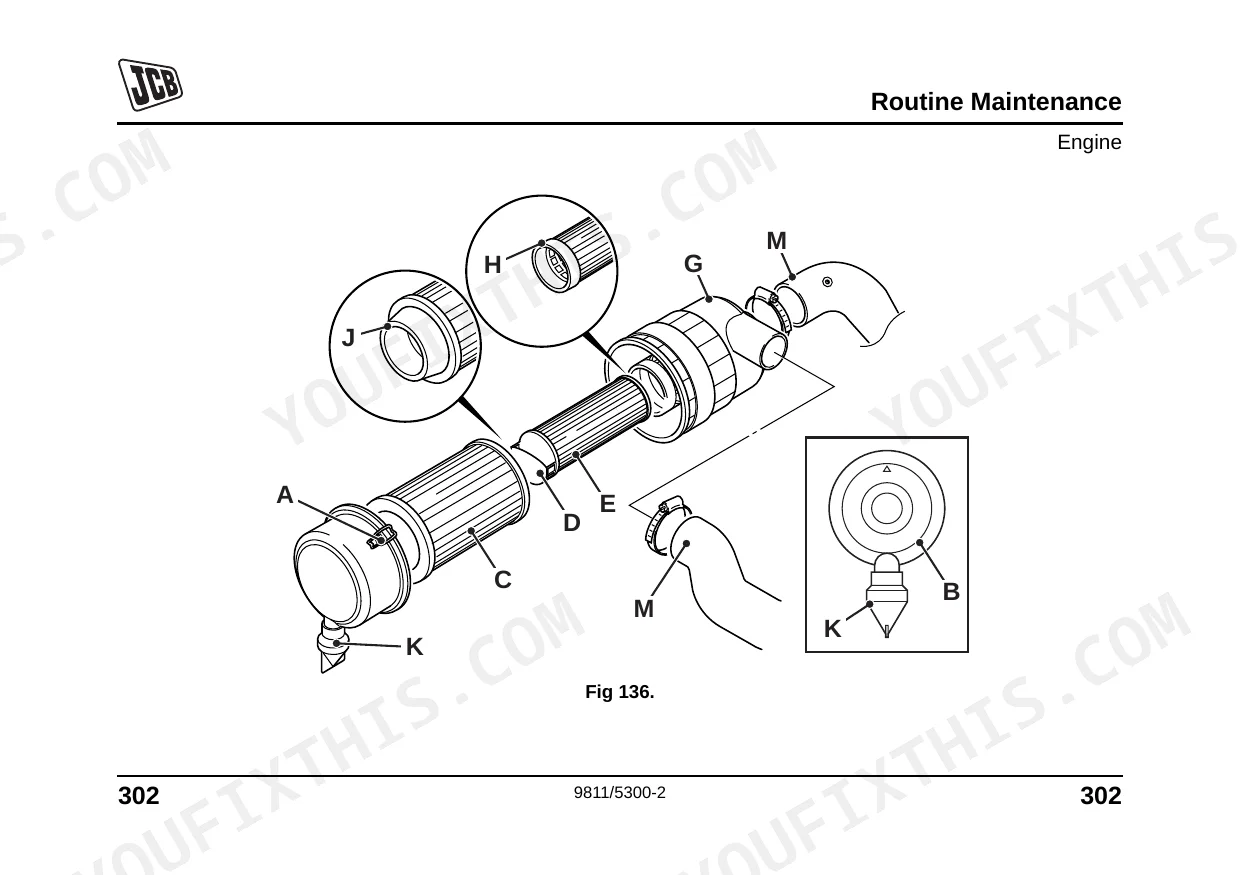
| Engine Fuel Filter Replacement Interval | 500, 1000, 2000 hours | p. 242 |
| Engine Fuel Filter Torque | hand tight only | p. 325 |
| Engine Coolant Capacity | 11.9 Litres | p. 253 |
| Engine Oil Drain Plug Torque | 40-60 Nm | p. 311 |
| Hydraulic Filter Cover Plate Screws Torque | 20 Nm | p. 334 |
| Hydraulic Suction Strainer Torque | 15-20 Nm | p. 336 |
| Midi CX Weight (Standard dipper and GP shovel) | 3700 kg | p. 399 |
| Midi CX Travel Speed (Maximum) | 28 kph | p. 417 |
| Whole-body vibration emission | 0.31 m/s2 | p. 415 |
JCB MIDI CX Common Problems This Manual Covers
JCB Midi CX machine moves only in slow or creep mode and lacks forward drive power p. 337
Check the transmission charge pump filter and fluid levels on page 337. Inspect the creep valve control cable for rust or binding. Verify the hydraulic system fluid capacity is filled to the 90.0 Litres specification on page 254 to prevent inching fluid bypass.
Manual Section: TransmissionEngine starts hard, runs rough under load, and stalls out frequently after cold starts p. 309
Drain the fuel filter to remove water and contamination as shown on page 309. Replace the primary and secondary fuel filters at the 500, 1000, and 2000 hours intervals listed on page 242. Install the new filters hand tight only.
Manual Section: EngineHydraulic and transmission response feels spongy and improves only after bleeding the brake system p. 327
Release the hydraulic pressure carefully before opening any lines. Check the foot brake fluid level on page 290 and bleed trapped air from the hydraulic brake and inching circuits. Verify the hydraulic suction strainer is clean and tighten it to 15-20 Nm on page 336.
Manual Section: Hydraulic SystemWheel nuts loosening during road travel or site operation with front tires losing air pressure p. 346
Inspect wheel studs for thread damage and clean the mounting surfaces. Torque the wheel nuts to 680 Nm using a calibrated wrench as specified on page 349. Verify the front tire pressure is inflated to 3.45 bar for general duty applications on page 416.
Manual Section: Tyres and WheelsFrequently Asked Questions
What is the torque spec for JCB Midi CX wheel nuts?
The wheel nuts on the JCB Midi CX should be tightened to a torque of 680 Nm (500 lbf ft) for both the front and rear wheels. It is recommended to tighten them in a diagonal sequence. For new machines or after a wheel has been removed, check the wheel nut torques every two hours until they remain correct.
How do you fix JCB Midi CX machine moves only in slow or creep mode and lacks forward drive power?
Most often this is a transmission or inching-circuit fault, not the engine. Start at the transmission charge pump filter and fluid level on page 337, and top the hydraulic system to its 90.0 litre capacity on page 254 so the inching circuit cannot bypass. A seized or rusted creep valve control cable will also hold the machine in creep, so free it off if the fluid checks out.
How do you fix engine starts hard, runs rough under load, and stalls out frequently after cold starts?
Cold-start roughness on the Midi CX usually traces back to fuel contamination. Drain water from the fuel filter on page 309, and if the symptom stays, renew the primary and secondary filters at their 500, 1000 and 2000 hour intervals on page 242. Fit the new filters hand-tight only, since over-tightening distorts the seal and draws air back in.
How do you fix hydraulic and transmission response feels spongy and improves only after bleeding the brake system?
A pedal that firms up only after bleeding points to air in the brake and inching circuits. Release hydraulic pressure first, check the foot-brake fluid level on page 290, then bleed the circuits. While the panel is open, confirm the hydraulic suction strainer is clean and torqued to 15-20 Nm on page 336, because a partly blocked strainer gives the same spongy feel.
Is this JCB Midi CX Operator Manual a digital download?
Instant PDF download — the full 430-page searchable Operator Manual is available immediately after payment. Open it on your laptop, tablet, or phone right in the shop.
Can I print specific sections of this JCB Midi CX Operator Manual?
Yes. The PDF has no DRM restrictions, so print any page or section you need for your shop. Works with any standard printer.


Reviews
There are no reviews yet.