
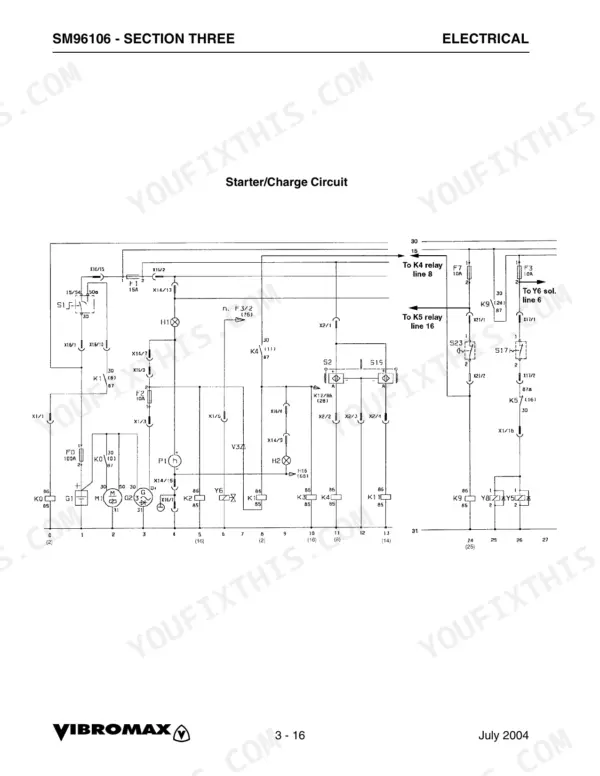
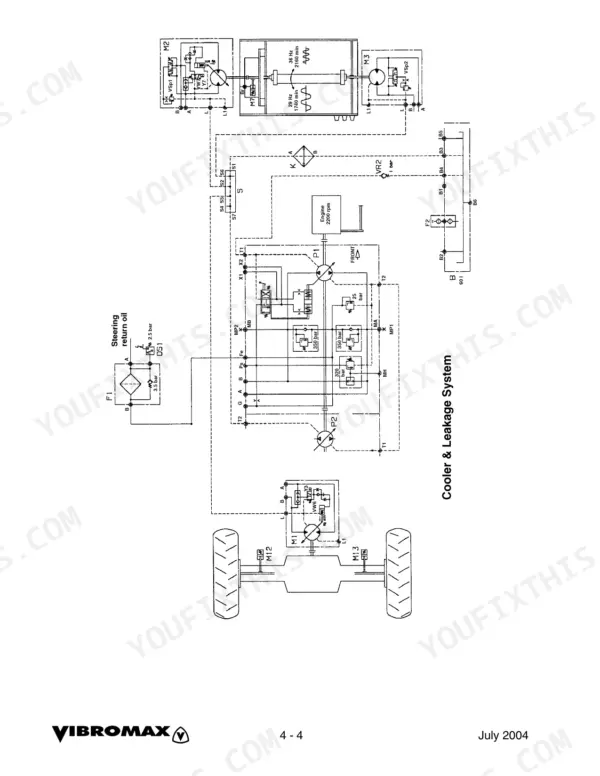
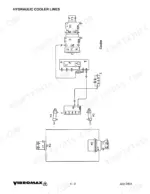
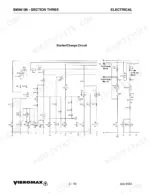
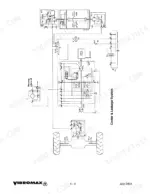
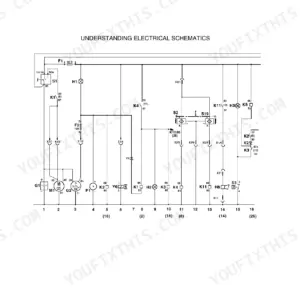
Within the hour you could be splitting an articulation joint or pulling the drum drive bearing on your Vibromax VM 106 single drum roller, and this 192-page Vibromax VM 106 service manual PDF (OEM ID SM96106) lays out that work from the first bolt to the final torque check. About a third of the book is electrical, with harness drawings and wire charts tracing the starter, charging, vibration, high speed, lighting and cab circuits wire by wire. Hydraulic schematics map the propulsion, vibration, steering and parking brake circuits, and each comes with diagnostics and the test station fittings where your gauge connects. Expect 350 bar at start up and 100 to 150 bar while operating; hose nuts on 16mm x 1.5 threads take 20 N-m (14.5 lb-ft). Out there it is you, the roller, and nobody to ask. Bookmarks take you straight to the chapter you need, and searching any wire number brings up the right page in seconds.
What's Inside This Vibromax VM 106 Manual
| System | Pages | Key Topics |
|---|---|---|
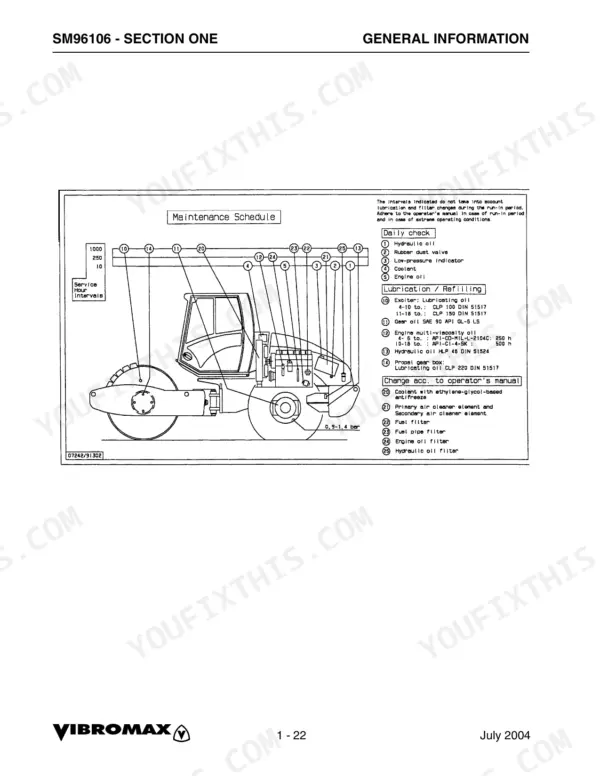
| General Information | 7-30 | Machine Description, Safety General, Maintenance Schedule |
| Engine | 31-32 | Cummins Engine Warranty |
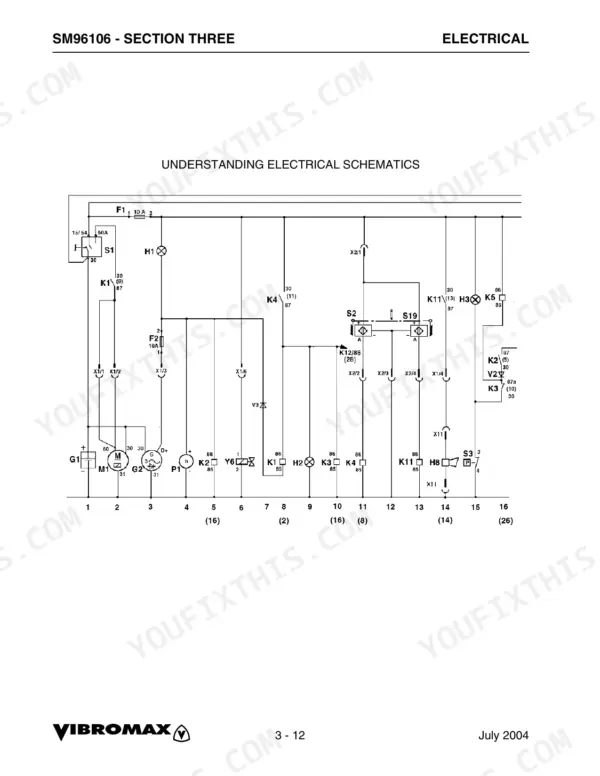
| Electrical | 33-96 | Fuses, Relays |
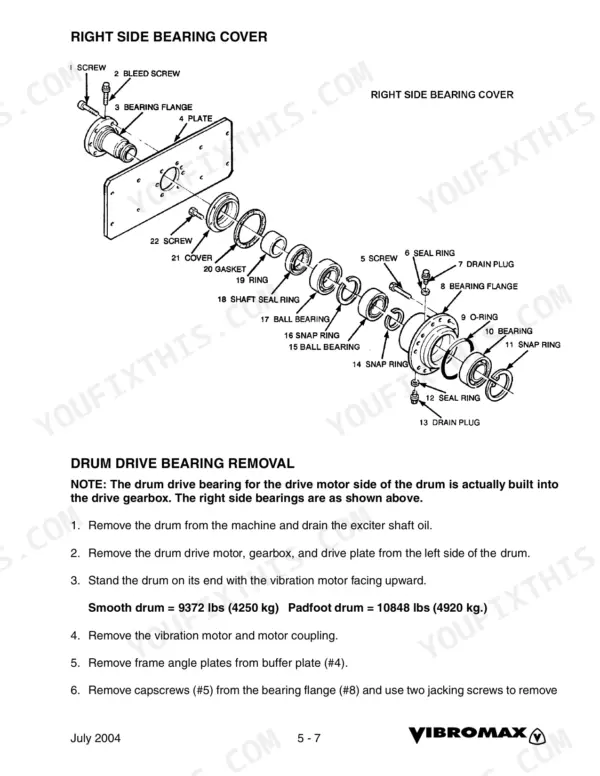
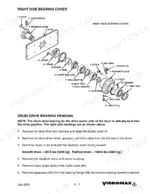
| Power Train | 131-144 | Drum Assembly (Drum Removal, Drum Installation, Right Side Bearing Cover) |
| Parking Brake System | 145-152 | Parking Brake Schematic |
| Vibration System | 153-170 | Vibration System Schematic, Vibration Frequency, Vibration Amplitude, Vibratory System Diagnostics, Drum Drawing, Drum - Left Side, Drum - Right Side, Drum Removal |
| Steering System | 171-182 | Special Tools, Articulation Joints (Disassembly, Assembly) |
| Chassis | 183-184 | |
| Attachments | 185-192 | Roll Over Protection Structure (ROPS Tightening Torques) |
Quick Reference Specifications
| Specification | Value | Page |
|---|---|---|
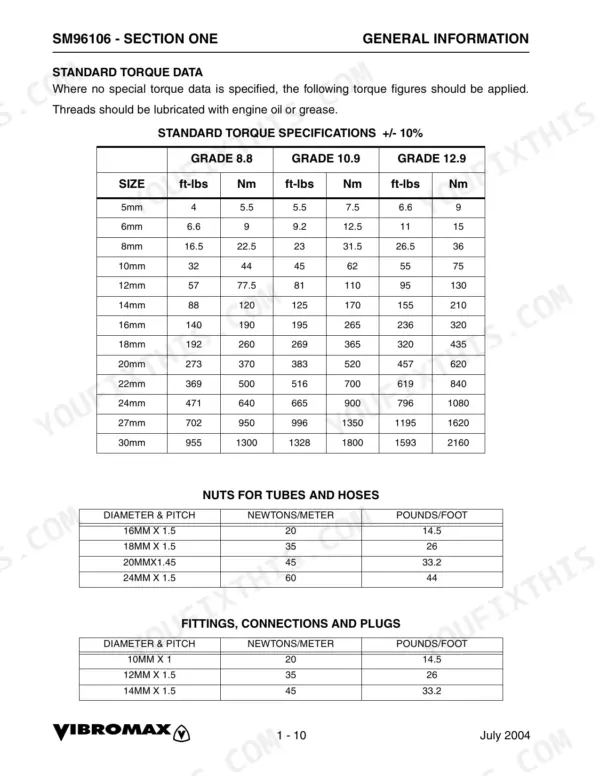
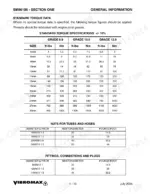
| Torque for Nuts for Tubes and Hoses (16mm x 1.5) | 20 Newtons/meter (14.5 pounds/foot) | p. 16 |
| Torque for Nuts for Tubes and Hoses (20mm x 1.45) | 45 Newtons/meter (33.2 pounds/foot) | p. 16 |
| Start up pressure | 350 bar | p. 115 |
| Operating pressure | 100 to 150 bar (1400 and 2200 PSI) | p. 115 |
| Vibration frequency (low) | 1860 vibrations per minute (31 Hz) | p. 115 |
| Vibration frequency (high) | 2160 vibrations per minute (36 Hz) | p. 115 |
| Vibration Frequency (1st Stage) | 1860 vpm (31 Hz) | p. 15 |
| Vibration Frequency (2nd Stage) | 2160 vpm (36 Hz) | p. 15 |
| Bearing flange shaft capscrew torque | 32 ft.lbs. (44 Nm) | p. 138 |
| Drive bearing housing assembly capscrew torque | 140 ft. lbs (190 Nm) | p. 139 |
| Vibration shaft end play | 1.8mm to 3.8mm | p. 140 |
| Vibration shaft to motor clearance | 4mm | p. 139 |
Vibromax VM 106 Common Problems This Manual Covers
Vibromax VM 106 hydrostatic propulsion charge pressure drops more than 10 percent between no load and maximum load
Check charge pressure at port #1 on the rear test station at maximum engine RPM and normal operating temperature; expect about 350 PSI. Compare no load and maximum load readings following page 111. If they differ by more than 10%, cap the front and rear motor pressure lines. If pressure stays low, inspect the charge relief valve, then reconnect one motor at a time. Never leave the machine with the engine running (page 25).
Manual Section: Propulsion System Diagnostics p. 111Drum vibration frequency runs low and the machine rides rough with a bucking motion
Measure vibration frequency with a frequency meter following page 115. Spec is 1860 vpm (31 Hz) in one direction and 2160 vpm (36 Hz) in the other. Before adjusting the vibration pump displacement controls, verify engine speed is set to maximum rpm and pressure test at taps #3 and #4. Start up pressure may hit 350 bar, then drops to 100 to 150 bar. Never leave the machine with the engine running (page 25).
Manual Section: Vibratory System Diagnostics p. 115Vibratory bearings wear out early with vibration frequency running above the recommended setting
Measure frequency with a frequency meter and reduce vibration pump flow until the shaft runs at 1860 vpm (31 Hz) or 2160 vpm (36 Hz) per page 115. When rebuilding, torque the drive bearing housing 16mm capscrews to 140 ft. lbs (190 Nm) with Loctite 271. Then verify 1.8mm to 3.8mm shaft end play and 4mm shaft to motor clearance on page 139. Never leave the machine with the engine running (page 25).
Manual Section: Vibratory System Diagnostics p. 115Alternator warning lamp on the instrument panel stays lit with the key on and engine running
Check the lamp pattern against the chart on page 52. A lamp that stays lit with the key on and engine running points to a regulator problem. With the engine off, measure from B+ to engine ground and look for system voltage (12 volts) following page 53. Run at half throttle with the lights on: V1 must not exceed 0.5 volts and V2 must not exceed 0.25 volts. Never leave the machine with the engine running (page 25).
Manual Section: Charging System Diagnostics p. 52Starter solenoid clicks when the key is turned to start but the engine will not crank
Fasten the manual shut off lever on the injection pump in the OFF position before testing (page 55). A clicking solenoid points to a poorly charged battery, corroded cables, a bad connection, a poor ground or a bad solenoid (page 56). Measure from the starter case to the negative battery terminal with the key in start; over 0.5 volts means a poor ground. The starter supply terminal should read 8.5 to 10.0 volts (page 57). Remove jewelry and watch bands before working on batteries (page 26).
Manual Section: Starter System Diagnostics p. 56Battery keeps discharging while the machine sits parked with the key switch in the OFF position
Remove the battery ground cable with the key OFF and connect a test lamp between the negative post and the cable. A lit lamp means a power source is going to ground (page 53). Load test only at 80% charge or better: 300 amps for 15 seconds, wait 30 seconds, then half the cold crank rating for 15 seconds. Compare the reading against the table on page 51. Remove jewelry, and never charge a frozen battery (page 26).
Manual Section: Charging System Diagnostics p. 53Frequently Asked Questions
What are the torque specifications for the Vibromax VM 106?
The manual provides standard torque specifications based on bolt grade and size. For example, a 10mm Grade 8.8 bolt requires 32 ft-lbs (44 Nm), while a 10mm Grade 12.9 bolt requires 55 ft-lbs (75 Nm). p. 16
Why is the Vibromax VM 106 not vibrating?
Vibration will not function when the machine is in HIGH speed travel. Additionally, the vibration system is controlled by relay K7, which will keep the vibration circuit open during high-speed travel to prevent poor compaction results. p. 40
How do you check the hydraulic pressure on a Vibromax VM 106?
Hydraulic pressures can be measured from the centrally located test station under the engine hood. You can use either a VT8002 gauge set or a VT8004 adapter fitting to check the pressures at the test ports. p. 106
What are the engine oil filter replacement specs for the Vibromax VM 106?
The engine oil filter should be replaced after the first 250 hours of operation, and then every 500 hours of operation thereafter. Ensure you follow the maintenance schedule to maintain the Cummins engine warranty. p. 29
What is the capacity of the hydraulic system for the VM 106?
The total capacity for the hydraulic system is 21.1 gallons (80 liters), while the reservoir alone has a capacity of 15.9 gallons (60 liters). p. 13
Is this Vibromax VM 106 manual a download or a disc?
A single searchable PDF file of 192 pages, downloadable right after payment. Nothing ships, nothing waits in the mail.
Am I free to print this Vibromax VM 106 Service Manual?
Yes. Print a chapter or just the pages for the job at hand, for use in your own shop. Any home or office printer works.
Reviews
There are no reviews yet.