
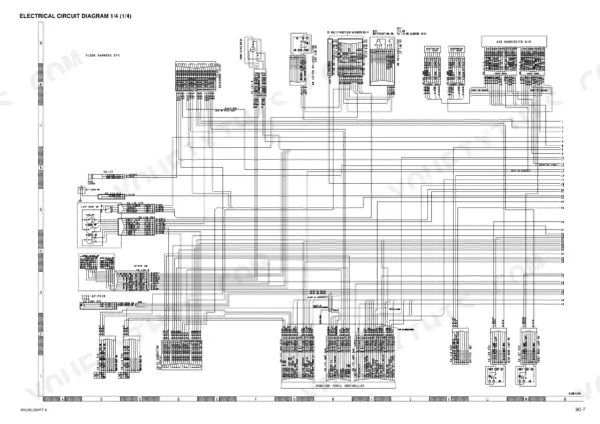
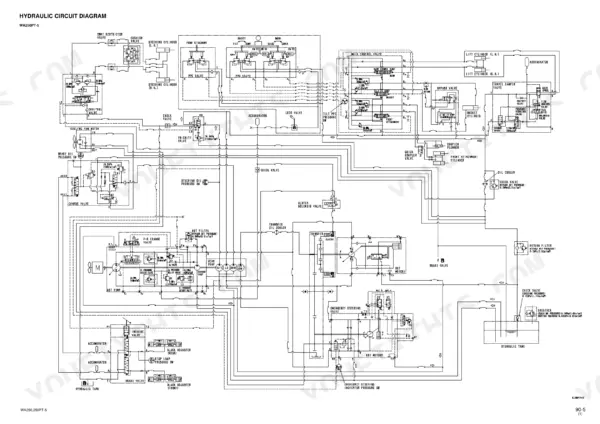
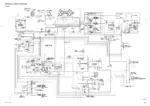
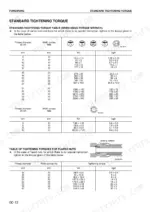
Power train, axles, differentials and final drives get the heaviest treatment in this 849-page Komatsu WA250-5H, WA250PT-5H shop manual PDF (OEM ID VEBM230102), and the wheel loader coverage widens from there into engine, electrical and hydraulic work. Hydraulic and electrical circuit diagrams close out the book, putting pump-to-loader-valve routing beside the harness layout you trace when a circuit drops out. Testing and Adjustment fills roughly two fifths of the pages, with engine and chassis standard value tables, error codes and troubleshooting charts, while Disassembly and Assembly carries you through fuel injection pump, cylinder head and complete engine removal. Confirm twin 24 V 110 Ah batteries and a 24 V 60 A alternator before condemning the starter, and torque a No. 10 O-ring boss plug to 11.27 ± 1.47 Nm. Guessing on a final drive buys you a second teardown. Your bookmarked, text-searchable copy prints clean, so the pages can go to the bench and take the grease.
What's Inside This Komatsu WA250-5H, WA250PT-5H Manual
| System | Pages | Key Topics |
|---|---|---|
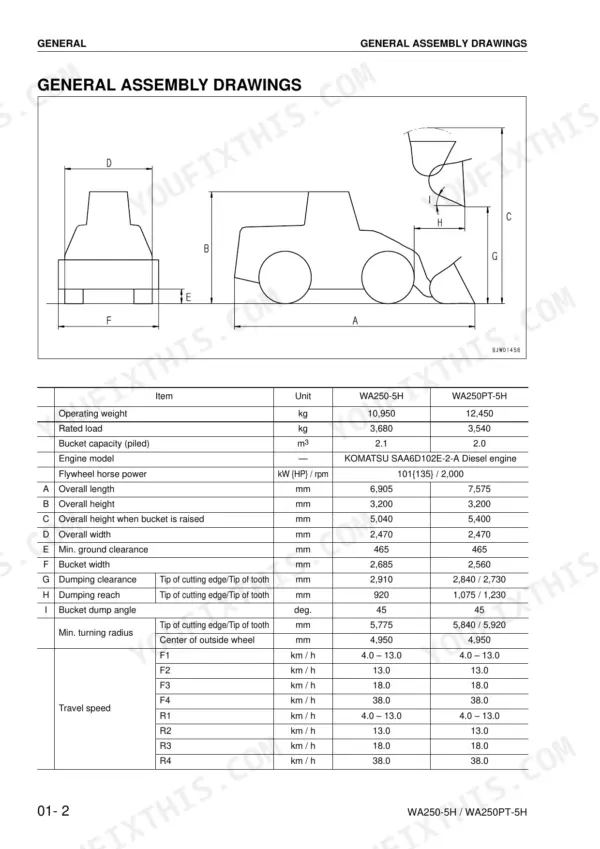
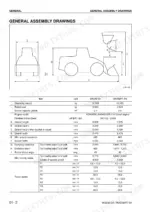
| General | 27-36 | General Assembly Drawings, Specifications, Weight Table |
| Structure, Function and Maintenance Standard | 37-280 | Power Train, Axle, Differential, Final Drive |
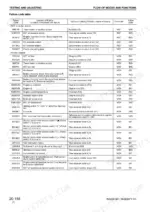
| Testing and Adjustment | 281-616 | Standard Value Table for Engine, Standard Value Table for Chassis, Tools for Testing, Adjusting, And Troubleshooting |
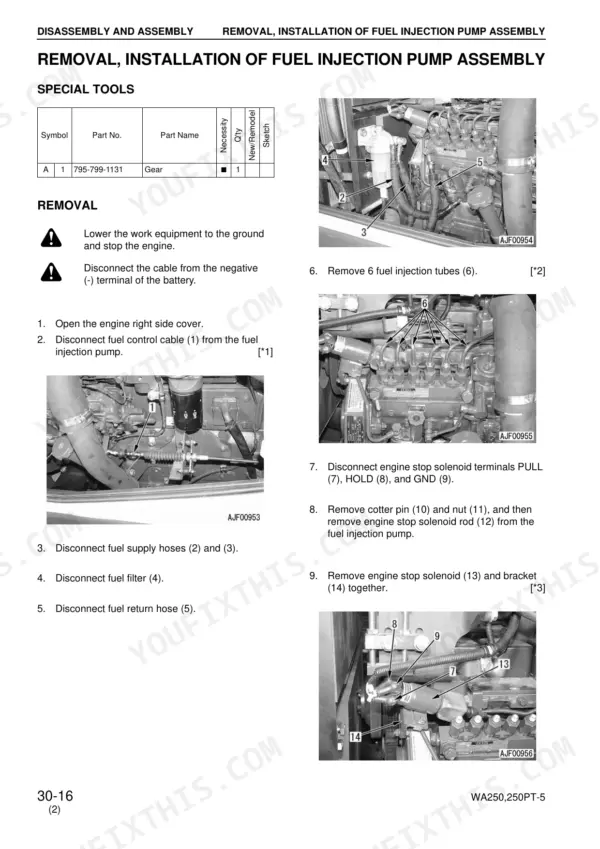
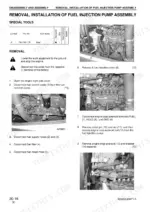
| Disassembly and Assembly | 617-830 | Removal, Installation of Fuel Injection Pump Assembly, Installation of Cylinder Head Assembly, Installation of Engine Assembly |
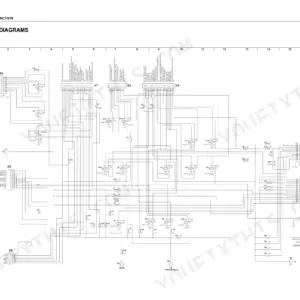
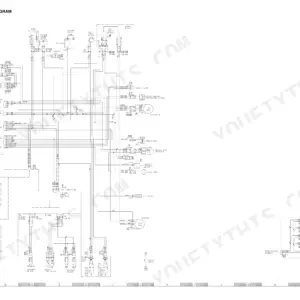
| Others | 831-849 | Hydraulic Circuit Diagram, Electrical Circuit Diagram |
Quick Reference Specifications
| Specification | Value | Page |
|---|---|---|
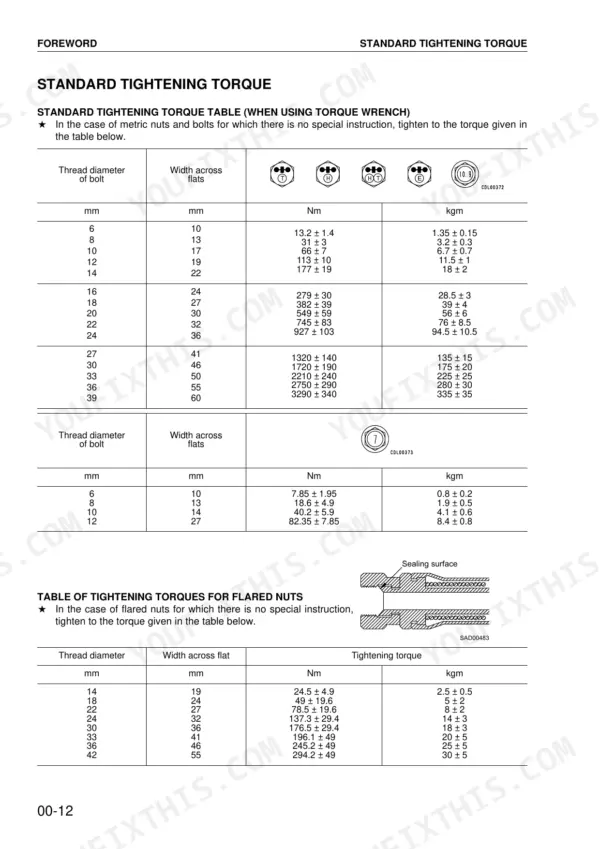
| O-ring boss plugs torque (Nominal No. 08) | 7.35 ± 1.47 Nm | p. 17 |
| O-ring boss plugs torque (Nominal No. 10) | 11.27 ± 1.47 Nm | p. 17 |
| Starting motor | 24 V 4.5 kW | p. 30 |
| Alternator | 24 V 60 A | p. 30 |
| Battery | 24 V 110 Ah x 2 pcs. | p. 30 |
| Engine mounting bolt torque | 610-765 Nm {62.5-78 kgm} | p. 651 |
| Radiator pressure valve opening pressure | 68.6 kPa | p. 40 |
| Radiator vacuum valve opening pressure | 0-4.9 kPa | p. 40 |
| Set pressure of high-pressure relief valve | 44.1 MPa {450 kg/cm2} | p. 46 |
| Set pressure of high-pressure cut-off valve | 41.2 MPa {420 kg/cm2} | p. 46 |
| Hydraulic tank bypass valve setting pressure | 0.2 MPa {2.04 kg/cm2} | p. 150 |
| Breather air intake valve set pressure | 3.0 ± 0.3 kPa {0.03 ± 0.003 kg/cm2} | p. 151 |
Komatsu WA250-5H, WA250PT-5H Common Problems This Manual Covers
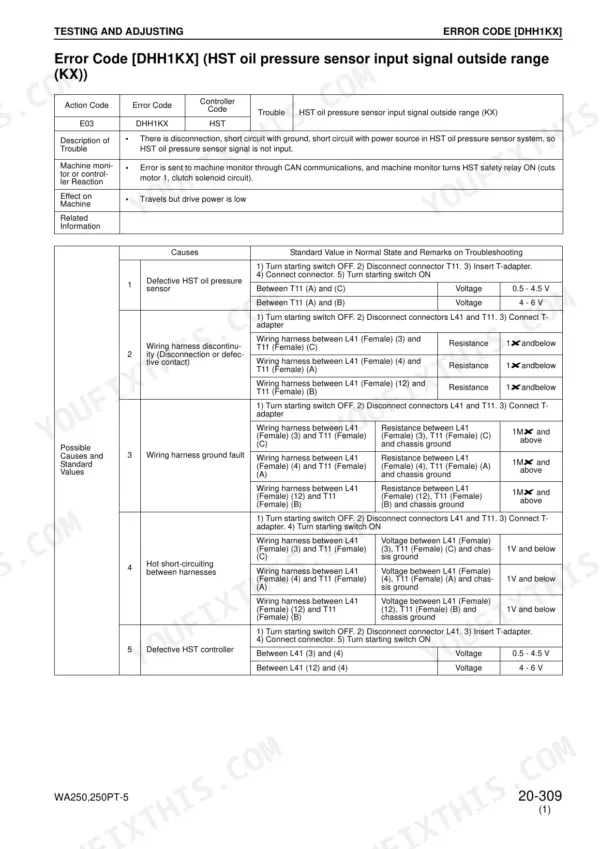
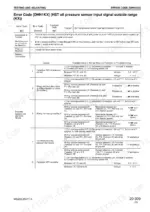
Komatsu WA250-5H HST oil pressure sensor error DHH1KX, machine travels but drive power is low
Park on level ground, insert the safety pins and block the tires before testing (page 281). Turn the starting switch OFF, disconnect T11, fit a T-adapter and switch ON. Check for 0.5 to 4.5 V between T11 (A) and (C) and 4 to 6 V between (A) and (B), following page 419. Then check that the harness from L41 to T11 reads 1 Ω and below.
Manual Section: Error Code [DHH1KX] HST oil pressure sensor p. 419Engine revolution sensor mismatch code DLE2LC, machine travels with low drive power
Block the tires and set the safety pins on level ground before you start (page 281). With the starting switch OFF, disconnect E12 and measure 500 to 1,000 Ω across pins (1) and (2), following page 421. Check that each pin reads 1 MΩ and above to chassis ground. Then test the harness between L42 (4) and E12 (1) for a ground fault.
Manual Section: Error Code [DLE2LC] Engine revolution sensor p. 421Clutch solenoid code DX20KZ displayed, discontinuity or short circuit in the clutch solenoid system
Park on level ground, insert the safety pins and block the tires before troubleshooting (page 281). Turn the starting switch OFF, disconnect T05 and measure 15 to 35 Ω between (1) and (2), following page 428. Check HST safety relay L111 for 200 to 400 Ω between (1) and (2) before you blame the controller.
Manual Section: Error Code [DX20KZ] Clutch solenoid system p. 428HST controller power source defective, troubleshooting code HST-1, HST controller does not function
Block the tires on level ground with the safety pins in before testing (page 281). Check fuse 3 (10A, HST control A) and fuse 12 (20A, HST control B) in fuse box 1 against page 415. Measure 20 to 30 V between L41 (8) and (16), following page 431. Then test power source safety relay L102 for 200 to 400 Ω between (1) and (2), following page 430.
Manual Section: Troubleshooting of HST Controller System (HST Mode) p. 430HST oil filter clogging caution lamp stays lit on the machine monitor panel
Clean or replace the HST oil filter. The 1,000 h replacement interval is on page 254. If the lamp stays on, follow page 452: turn the starting switch OFF, disconnect T13 and check the clogging sensor to chassis ground, 1 MΩ and above with a normal filter, 1 Ω and below when clogged. To check the machine monitor, fit a T-adapter at L23, turn the starting switch ON and read L23 (6) to chassis ground: 20 to 30 V with a normal filter, 1 V and below when clogged. Don't keep working the machine with the lamp on, because dirt will circulate in the HST circuit.
Manual Section: Testing and Adjustment p. 452Transmission protection caution 989F00 displayed, machine will not shift down at speed
Check travel speed before you downshift. Page 418 says 989F00 is not a failure. The HST blocks the downshift when travel speed is above the allowable speed for shifting down, and above 40 km/h the controller cuts speed automatically. Slow the machine down and don't shift down while travel speed is still above the allowable downshift speed. Leave the HST components alone for this code.
Manual Section: Error Code [989F00] Transmission protection caution p. 418Frequently Asked Questions
How do I reset the failure-code display on a Komatsu WA250-5H or WA250PT-5H?
Only the stored fault history can be cleared; a current fault cannot be cleared. In the service mode, open the electrical system fault history, display the fault and press the U switch to go to the clearing screen, select YES and press t to clear it. To clear all faults at once, use the ALL CLEAR menu (page 348): U runs ALL CLEAR, < selects YES and t runs it. Data for a problem that is still active (flashing display) cannot be deleted. p. 244
What do Komatsu WA250-5H action codes E00, E01, E02, and E03 mean?
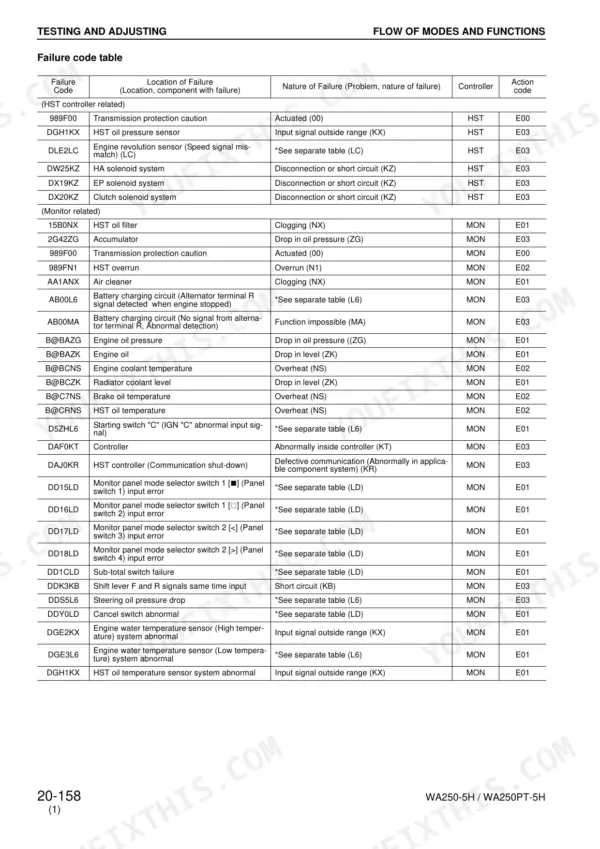
The action code tells the operator what to do when an abnormality occurs. E00: return the switches and levers for the control switch to the normal condition. E01: carry out maintenance after the operation or when operators change shift. E02: for an overrun-related display, reduce engine speed and machine speed and continue; for an overheat-related display, stop the machine and run the engine at mid-range speed under no load. E03 is the only code with CALL: contact a serviceman immediately. p. 342
How do I diagnose HST-1 on a Komatsu WA250-5H?
HST-1 indicates a defective HST controller power source. To diagnose, check the wiring harness for continuity and ground faults between connectors L41, L102, and fuse FS1. Also, check the HST power source safety relay (L102) by interchanging it with a normal relay and checking the resistance between pins (1) and (2), which should be 200-400 ohms. p. 430
What does error code DLE2LC mean on a Komatsu WA250-5H?
Error code DLE2LC indicates an engine revolution sensor signal mismatch. This means there is an abnormality in the speed calculated from the speed sensor signal compared to the engine revolution signal. To diagnose, check the engine revolution sensor resistance, which should be 500-1,000 ohms between pins (1) and (2). p. 421
What is the tightening torque for the cylinder head bolts on a Komatsu WA250-5H, WA250PT-5H?
The cylinder head bolts for the WA250-5 should be tightened in three stages. The first stage is 90 ± 5 Nm (9.18 ± 0.51 kgm). The second stage is 120 ± 5 Nm (12.24 ± 0.51 kgm). The third stage is an angle tightening of 90° ± 5°. p. 644
How will I receive this Komatsu WA250-5H Shop Manual?
You get a 849-page searchable PDF that downloads instantly after checkout. Open it on your laptop, tablet, or phone, and bring it right to the shop floor.
Does this Komatsu WA250-5H manual allow printing?
Yes. Many mechanics print the section they need for their own shop and bring it to the bench.



Reviews
There are no reviews yet.