
Part of the Case Repair Manuals.
A Cyclo drum that skips seed or a marker circuit that folds out of sequence can cost you a planting window. This Case 900 service manual PDF is the factory service book for the planter, 539 pages filed under OEM number 8-91771. Hydraulic schematics trace the level lift, blower, sequence valve, and counterbalance circuits, with a symbol reference section so you can read the diagrams cold. Electrical troubleshooting walks the marker wiring fault by fault, and the cylinder sections rebuild carrying wheels, assist wheels, row markers, and vertical fold wing lifts. Torque the opener disc mounting bolts to 150 to 160 lb ft (203 to 217 Nm), and replace any furrow firming point worn below 47/64 inch. An invented torque figure strips threads or drops a wing. Bookmarked and text searchable, the PDF puts the right spec on screen minutes after checkout.
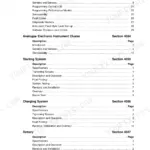
What's Inside This Case 900 Manual
| System | Pages | Key Topics |
|---|---|---|
| General | 3-12 | General Information, Specifications, Special Torques |
| Electrical | 13-83 | Electrical Troubleshooting, Manual Marker Electrical Wiring |
| Hydraulic Troubleshooting, Testing and Schematics | 84-120 | Troubleshooting, Blower System, Level Lift System, Counterbalance Valve, Pressure Switch, Solenoid Valves |
| Hydraulic Schematic Symbols and Component References | 121-130 | Schematic Symbols, Alternating Check Valve, Marker Solenoid Valve, Rotary Flow Divider, Holding Valves |
| Sequence Valves, Marker Valves, and Basic Hydraulic Valves | 131-265 | Sequence Valve Assembly, Inner/Outer Marker Solenoid Valves, Hitch Stabilizer Valve, Blower Motor, Flow Control Valve |
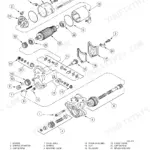
| Hydraulic Cylinders | 266-331 | Cylinder Diagrams, Carrying Wheels, Assist Wheels, Row Markers, Endwise Transport Wheels, Vertical Fold Wing Frame Lift |
| Chassis | 332-539 | Planter Row Unit Service, Cyclo Planter Seed Drum and Seed Tube Service, Cyclo Planter Seed Hopper, Horizontal Fold Adjustments, Plate Planter Hopper Bottom Equipment |
Quick Reference Specifications
| Specification | Value | Page |
|---|---|---|
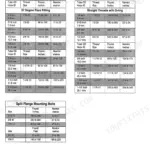
| SAE Grade 2, 1/4 bolt torque | 5 to 6 lb ft | p. 5 |
| SAE Grade 5, 1/4 bolt torque | 9 to 11 lb ft | p. 5 |
| Furrow Firming Point Wear Limit | Replace if worn to less than 47/64 inch | p. 8 |
| 10 amp fuse | 10 amp | p. 93 |
| Opener Disc mounting Bolt | 150 to 160 lb ft (203 to 217 Nm) | p. 334 |
| Opener Disc to Disc Clearance | 1/8 Inch Maximum | p. 334 |
| Gauge Wheel Pivot Pin | 150 to 160 lb ft (203 to 217 Nm) | p. 334 |
| Seed shoe bottom width at front | 7/8 inch | p. 348 |
| Modular Solenoid Valve Resistance | 7 to 10 ohms | p. 8 |
| Waterman Solenoid Valve Resistance | 9.5 to 13.50 ohms | p. 8 |
| Seed Opener Disc Minimum OD | 13-1/2 inch | p. 8 |
| Relief Valve Pressure (Holding and Sequence Valves) | 2600 PSI | p. 8 |
Case 900 Common Problems This Manual Covers
Case 900 planter dropping seeds erratic, skips increasing across rows, opener discs look worn
Measure each opener disc diameter and replace any disc worn under 13-1/2 inches. Check bearing play; more than 1/8 inch of movement, per page 343, means the bearing is done. Set disc to disc contact so the outer edges stay within 1/8 inch, then torque mounting bolts to 150 to 160 lb ft (203 to 217 Nm).
Manual Section: Planter Row Unit Service p. 343Row units bounce and depth control feels sloppy, planting depth varies row to row
Grab each row unit and rock it side to side; any play means worn parallel arm bushings or lower parallel arms, so replace them in pairs. Check gauge wheel bearings for wobble and torque the pivot pins to 150 to 160 lb ft (203 to 217 Nm) using the row unit teardown steps that start on page 332.
Manual Section: Planter Row Unit Service p. 332Seed trench not closing, seeds visible on top of ground behind covering discs
Inspect the furrow firming point and replace it once it wears under 47/64 inch, the wear limit on page 8. Measure the seed shoe bottom; it should run 7/8 inch wide at the front and 1-1/8 inch at the rear, per page 348. Replace cupped or thinned 8 inch covering discs so soil rolls back over the trench.
Manual Section: Planter Row Unit Service p. 348Planter raises slow or won't stay up, hydraulic lift loses pressure in the field
Check the reservoir oil level and change the hydraulic filter before chasing valves. Tee a gauge into the lift circuit and test relief pressures; holding and sequence valve relief should be 2600 PSI, flow divider relief 525 to 575 PSI. Work through the level lift troubleshooting starting on page 84 against the schematic on page 88.
Manual Section: Hydraulic Troubleshooting, Testing and Schematics p. 84Cyclo drum not holding seed, monitor shows skips, blower sounds weak at planting speed
Test the blower fan hydraulic motor shaft speed with a phototach; anything under the 3700 RPM minimum will not hold seed on the drum. Verify PTO pump output, 8 gpm at 2000 PSI for a single module, per page 9. Then pressure check the seed hopper for air leaks at the cover seal and seams.
Manual Section: Hydraulic Troubleshooting p. 84Frequently Asked Questions
What is the torque specification for the row unit mounting U-bolts on a Case 900 planter?
The row unit mounting U-bolts should be tightened to a torque of 80 to 90 lb ft (108 to 122 Nm). p. 10
What is the procedure for checking the seed drum roundness?
To check the roundness, install a dial indicator on the drum between the first and second row of holes. Mark the low point, then take three more readings at 90 degree intervals. If the runout is more than 0.200 inch (5.08 mm), remove the seed drum and place it on a clean flat surface, pushing down on the open end at the high points to reshape it. p. 42
What is the correct torque for the fertilizer disc mounting nut on a Case 900 planter?
The fertilizer disc mounting nut should be tightened to a torque of 80 to 90 lb ft. p. 10
How do you adjust the wing latch spring on a horizontal fold planter?
Loosen the lock nut and turn the plug until the dimension from the bolt head to the plug is 1-13/16 inch (46 mm). Once the dimension is correct, tighten the lock nut. p. 11
What is the required relief valve pressure in the holding and sequence valves on a Case 900 planter?
The relief valve pressure for the holding and sequence valves is 2600 PSI. p. 8
Will this Case 900 Service Manual download right away?
A single searchable PDF file of 539 pages, downloadable right after payment. Nothing ships, nothing waits in the mail.
Can I print specific sections of this Case 900 Service Manual?
Yes. Printing works from any reader and any printer, for your own shop use.




Reviews
There are no reviews yet.