


Part of the John Deere Repair Manuals.
When a planter monitor starts lying mid-season, the 357 pages of Technical Manual TM1270 buy you one thing: a console you can trust again. This John Deere Computer Trak technical manual PDF covers all five monitors, 100 through 300, plus the Monitrol, dual-rate, and population systems, as fitted to six 7000-family planters. Wiring diagrams and harness details trace every circuit from the console back to each seed tube sensor, and test procedures with the Deluxe or Standard test unit walk every monitor through voltage, low-rate, and row-failure checks. Field testing confirms population counts and distance wheel slippage before you commit seed to the ground. Put a meter on a suspect seed tube sensor: less than 1000 ohms in both directions condemns it, while a healthy distance sensor swings from +1 to +8 volts across its 56-slot disk. A false row alarm at planting time costs acres. Bookmarked and crisp, the PDF downloads in minutes and puts the planter back in the field.
What's Inside This John Deere Computer Trak 100, 150, 200, 250, 300 Manual
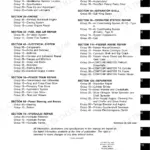
| System | Pages | Key Topics |
|---|---|---|
| General Information | 3-35 | Safety, Safety Signs, General, Specifications, Predelivery, Delivery and After-Sale Services |
| Field Testing | 36-45 | Field Testing Monitors, Check Population, Check Distance Wheel Slippage |
| Computer Trak Monitors | 46-157 | Component Location Drawings, Computer Trak 100 Monitor, Computer Trak 150 Monitor, Computer Trak 200 Monitor, Computer Trak 250 Monitor, Computer Trak 300 Monitor |
| Distance Sensors | 158-171 | Component Location Drawings, Distance Wheel, Radar, Radar Adapter |
| Seed Tube Sensors | 172-183 | Component Identification Drawings, Testing W/Deluxe Test Unit, Testing W/Standard Test Unit |
| Monitor Location Drawings | 184-187 | Green Monitor, Black Monitor, Standard Test Unit, Deluxe Test Unit, AC-DC Converter |
| Monitor Console Tests (Section 50) | 188-215 | Green Monitor W/Deluxe and Standard Test Unit, Black Monitor Without Alarm, Black Monitor with Alarm, Connect Power, Test Voltage, Test Low Rate, Test Audible Alarm |
| Dual-Rate Calibrated Monitor (Section 55) | 216-225 | Deluxe Test Unit, Standard Test Unit, Connect Power, Test Low Rate |
| Population Monitor (Section 60) | 226-259 | Location Drawings, Black Population Monitor, Green Population Monitor, Deluxe and Standard Test Units, Test Row 1 Failure, Test Planter Stop |
| Monitrol System (Section 65) | 260-341 | Monitrol Location Drawings, Connect Power, Test Voltage, Test Manual Adjustment, Harness Details, Wiring Diagrams |
| Contents and Index | 342-353 | Section Contents, Alphabetical Index |
Quick Reference Specifications
| Specification | Value | Page |
|---|---|---|
| Sensor signal voltage | +1 to +8 volts | p. 163 |
| Resistance for defective sensor | less than 1000 ohms | p. 174 |
| Rolled-up paper tube diameter | 1/2 in. | p. 183 |
| Distance Wheel 7.60-15 Distance to be marked off | 240 ft | p. 38 |
| Distance Wheel 7.50-20 Distance to be marked off | 280 ft | p. 38 |
| Power Module Fuse | 5 Amp | p. 137 |
John Deere Computer Trak 100, 150, 200, 250, 300 Common Problems This Manual Covers
John Deere Computer Trak monitor all row lights stay on at startup and never clear
Check each seed tube sensor with an ohmmeter, measuring resistance in both directions. Less than 1000 ohms both ways means the sensor is defective; replace it using the test procedure on page 174. If sensors check good, inspect the row plug connectors for pushed-out or corroded pins and repair the planter harness per page 348.
Manual Section: Seed Tube Sensors p. 174One row drops out or fails repeatedly while neighboring rows keep planting fine
Test the suspect sensor off the planter: pass a rolled-up paper tube about 1/2 in. in diameter through the light beam and watch for the row to register, per page 183. If the sensor responds, swap it with a known good row; a failure that stays on the same row points to wiring, so check harness repairs on page 348.
Manual Section: Seed Tube Sensor Diagnostics p. 183Monitor shows no ground speed or the speed reading jumps around while planting
Test the distance wheel sensor signal; it should swing from +1 to +8 volts as each slot in the 56 slot disk passes the sensor, per page 163. Clean mud packed around the disk, then check wheel slippage by marking off 240 ft (73.2 m) for a 7.60-15 tire using the field test on page 38.
Manual Section: Distance Sensors p. 163Monitor display goes dead or blank in the field, no lights on power up
Check the battery connections first; clean corroded terminals and verify a tight ground strap before condemning the console. On a Computer Trak 300, verify the power module has two good 5 amp fuses, covered on page 137. If power and fuses check good but the display stays dead, run the display malfunction chart for your monitor.
Manual Section: Computer Trak Monitors p. 137Population count reads far higher or lower than actual seed drop in the row
Verify the monitor against a hand count using the check population procedure starting on page 36. Check distance calibration before blaming sensors: mark off 280 ft (85.3 m) for a 7.50-20 distance wheel tire, per page 38, and confirm the wheel is not slipping. Clean dust and seed treatment residue from every sensor eye before re-checking.
Manual Section: Field Testing p. 36Frequently Asked Questions
What are the inch cap screw torque specifications in the Computer Trak technical manual?
The torque specifications for inch cap screws vary by SAE grade and size. For example, a 1/4 inch SAE Grade 5 cap screw has a dry torque value of 16 N·m (12 lb-ft), while a 1/2 inch SAE Grade 8 cap screw has a dry torque value of 142 N·m (105 lb-ft). p. 32
How do you check the radar signal on a Computer Trak 200 or 300 monitor?
Mark off a 100 ft (30.5 m) course on level ground. Drive the tractor without the planter at 4-1/2 mph (7.2 km/h) for Radar I sensors, or 3-1/2 mph (5.6 km/h) for Radar II and INTELLITRAK sensors, pushing the CALIBRATE switch on the back of the console down at the start marker and up at the end marker. Repeat four times: the readings should be within 5 per cent of each other, between 1,400 and 1,600 counts for Radar I and 1,850 to 2,050 counts for Radar II. Outside that band, or no reading at all, the radar unit is defective. p. 167
What is the replacement bulb part number for the row lamps on a Computer Trak monitor?
Row lamp bulbs are part number B32205. In the Test Low Rate check the row lamps should light within 30 seconds of turning the SEEDS/MIN knob fully clockwise; if one or more stays dark, fit a new B32205 bulb, and if the lamp still does not light the console itself is defective. p. 218
What is the correct gap between the distance sensor pickup prongs and the round magnet on a John Deere Computer Trak system?
If the distance light is not flashing properly, adjust the pickup and housing to provide a gap of approximately 0.030 or 1/32 in. (0.8 mm) between the pickup prongs and the round magnet. p. 38
What is the procedure for testing the audible alarm on a Computer Trak 150 monitor?
To test the audible alarm, turn the selector switch to the FAILURE ROW 1 position. Row 1 lamp on the console will light and the alarm must sound continuously. p. 78
Is this manual a download or a disc?
You get a 357-page non-searchable PDF that downloads instantly after checkout. Open it on your laptop, tablet, or phone, and bring it right to the shop floor.
Can I print pages of this manual for my own shop?
Yes. Print a chapter or just the pages for the job at hand, for use in your own shop. Any home or office printer works.








Reviews
There are no reviews yet.