
Part of the John Deere Repair Manuals.
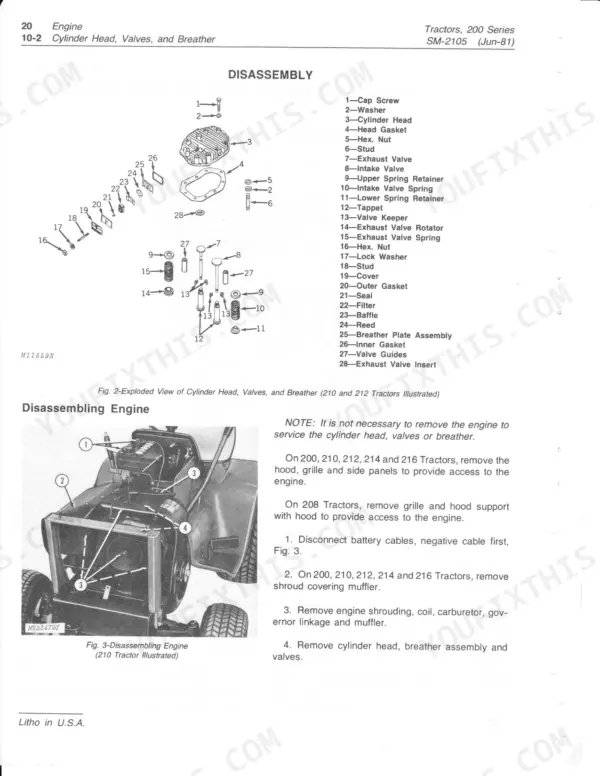
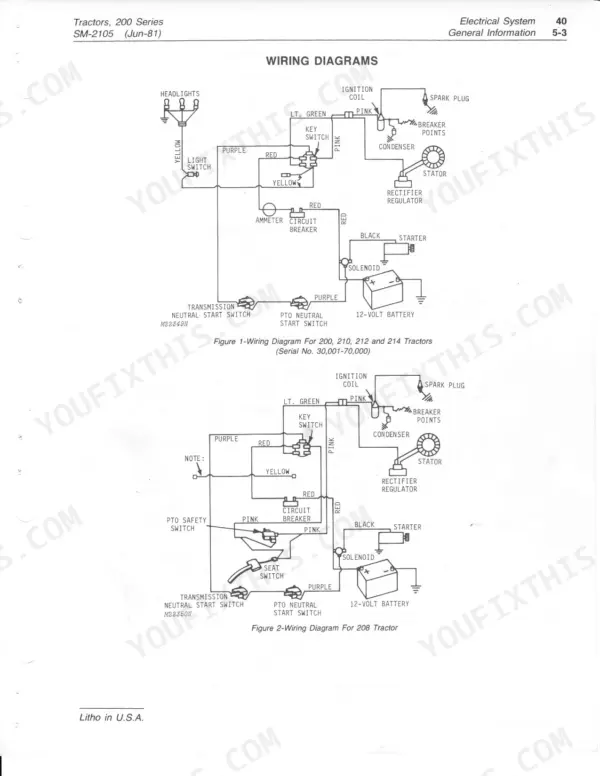
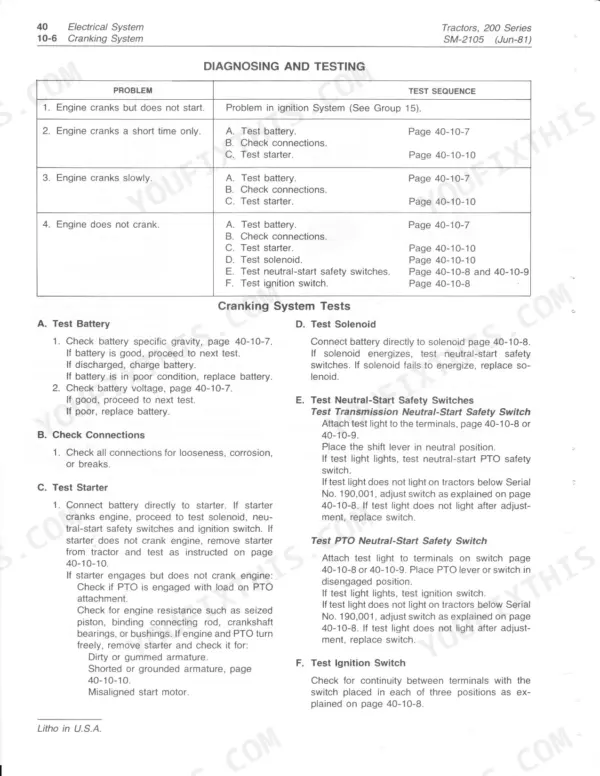
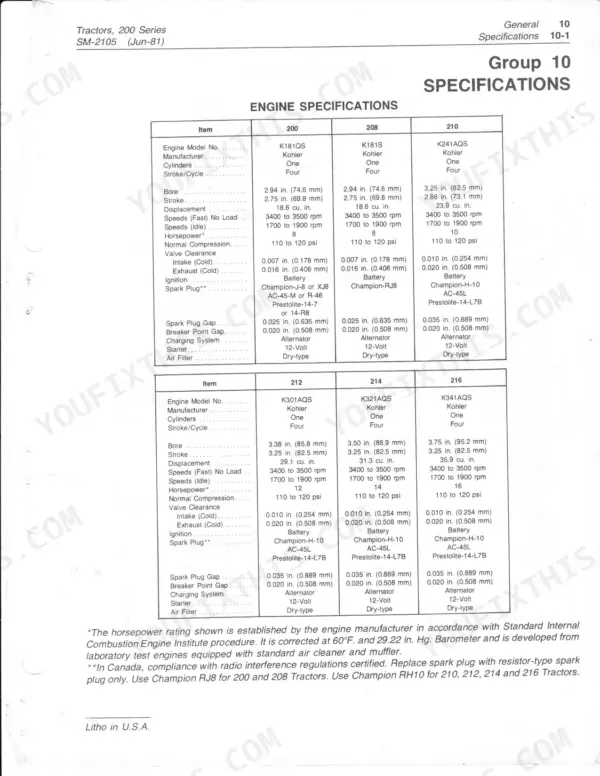
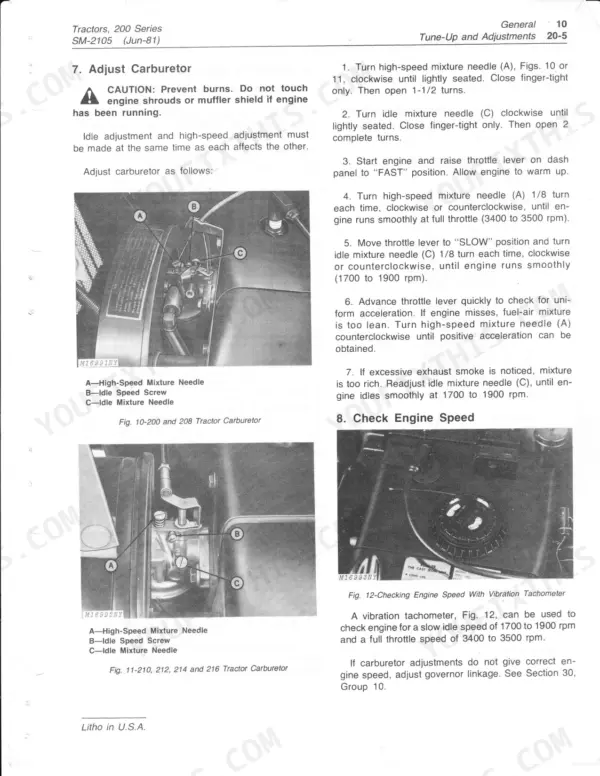
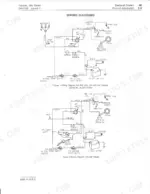
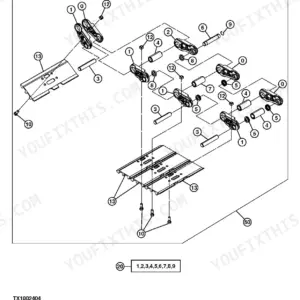
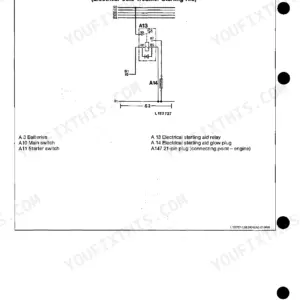
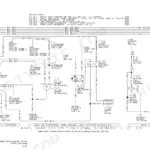
Wrenching on a 1982 John Deere 200 series? This 88-page John Deere 200 Service Manual PDF covers the 200, 208, 210, 212, 214, and 216 Lawn and Garden Tractors, from tune-up adjustments to major engine recondition. You get factory wiring diagrams for the cranking, ignition, charging, and electric PTO clutch circuits, exploded views throughout the engine and power train sections, and a troubleshooting group backed by page after page of step-by-step procedures for the clutch, variable speed drive, 4-speed transaxle, and hydraulic lift. Gap the spark plug at 0.025 in. (0.635 mm), torque it cold to 18-22 ft-lbs, and confirm your battery reads 11.5 to 12.6 volts before testing the cranking system. No more chasing electrical gremlins with a multimeter and a prayer. Bookmarked with a full text layer: search any spec, jump to any section, fix the tractor.
Other edition of this manual
What's Inside This John Deere 200-216 Series Manual
| System | Pages | Key Topics |
|---|---|---|
| General | 1-9 | Tractor Identification, Specifications, Fuel and Lubricants, Tune-Up and Adjustments |
| Engine | 10-22 | Cylinder Head, Valves and Breather, Minor Engine Recondition, Major Engine Recondition, Specifications |
| Electrical System - Cranking and Charging | 23-40 | Battery and Cables, Starter Motor, Charging Circuit and Regulator, Cranking Circuit Tests |
| Electrical System - Ignition, Lights and Wiring | 41-58 | Ignition Circuit and Coil, Safety Interlock Switches, Headlights, Fuses, Wiring Diagrams and Harness Repair |
| Power Train | 59-74 | General Information, Clutch and Variable Speed Drive, PTO Clutch |
| Miscellaneous | 75-82 | Steering Linkage, Front Wheels and Axles, Lift Linkage |
| Tractor Attachments | 83-88 | 37A Snow Thrower, 39 and 47 Rotary Mowers, Rotary Tiller |
Quick Reference Specifications
| Specification | Value | Page |
|---|---|---|
| 200 | ||
| Spark Plug Gap | 0.025 in. (0.635 mm) | p. 3 |
| All Models | ||
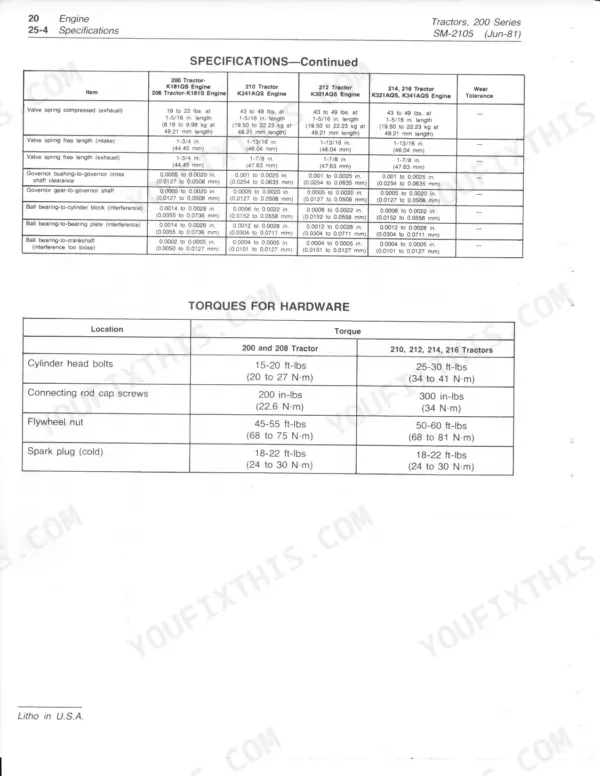
| Spark plug (cold) | 18-22 ft-lbs (24 to 30 N·m) | p. 21 |
| Battery voltage | 11.5 to 12.6 volts | p. 34 |
| force at the end of the axle to rotate it up or down | 25 to 75 lbs. (11.34 to 34.02 kg) | p. 80 |
| Engine Normal Compression | 110 psi | p. 3 |
| Fuel Tank Capacity | 3-1/2 U.S. Gallons | p. 4 |
| Transaxle Capacity | 3-1/2 U.S. Pints | p. 4 |
| Tire Inflation Pressure (Regular Equipment, Front) | 10 psi | p. 9 |
| 200, 208 | ||
| Engine Horsepower | 8 hp | p. 33 |
| Engine Spark Plug Gap | 0.025 in. | p. 3 |
| Crankcase Capacity | 2-1/2 U.S. Pints | p. 4 |
John Deere 200-216 Series Common Problems This Manual Covers
John Deere 200 series front axle hub worn loose, front end wobbles and axle drops through hub
Jack up the front end and rock each wheel at 12 and 6 o'clock; play at the hub means the hub bore is worn out. Replace the hub, then check pivot preload: rotating the axle end up or down should take 25 to 75 lbs. (11.34 to 34.02 kg) of force, per the spec on page 80.
Manual Section: Miscellaneous Group p. 80Engine cranks slowly or will not turn over at all in cold weather
Check battery voltage; it should read 11.5 to 12.6 volts before any cranking test, per page 34. Verify electrolyte sits 1/4 to 1/2 inch above the plates and top off with distilled water. If voltage falls below 9.6 volts after 15 seconds of cranking, replace the battery, then run the cranking system tests on page 33.
Manual Section: Cranking System Diagnosing and Testing p. 33Engine misfires, lacks power, or starts then dies after a few seconds
Pull the spark plug and inspect for fouling or a cracked insulator. On models 200 and 208, set the gap to 0.025 in. (0.635 mm) per the specs on page 3. Reinstall a cold plug and torque it to 18-22 ft-lbs (24 to 30 N·m), listed on page 21. If the misfire continues, test the points, condenser, and coil.
Manual Section: Ignition System Diagnosing and TestingElectric PTO clutch will not engage, blades stay stopped with the switch on
Check the clutch switch and lead wires for loose or corroded connectors before condemning the clutch. Test the battery; a weak battery will not pull in the field coil. Verify the field coil and ground circuit with an ohmmeter. If you pull the clutch for service, torque the retaining bolt to 55 ft-lbs, listed on page 58.
Manual Section: Electric PTO Clutch Diagnosing MalfunctionsFrequently Asked Questions
How do I reset the variator on John Deere 200 series tractors?
To adjust the variator linkage, place the variable speed control lever in notch 5 on the quadrant. Loosen the cap screw one to two turns with a 3/4-inch (19.050 mm) socket wrench, then crank the engine until the clutch pedal raises. Take up slack by pushing down on the cap screw and tighten it, then replace the button plug in the adjusting hole. If the tractor still does not move in the first notch, install a new primary belt. p. 69
What are the torque specifications for the flywheel on John Deere 208, 210, 212, 214, and 216 tractors?
For 200 and 208 Tractors, the flywheel nut torque specification is 45-55 ft-lbs (68 to 75 N·m). For 210, 212, 214, and 216 Tractors, the flywheel nut should be torqued to 50-60 ft-lbs (68 to 81 N·m). p. 21
How do I reset the clutch on a John Deere 200 series garden tractor?
To adjust the electric PTO clutch, disconnect the engine spark plug wire and remove the key from the ignition switch, ensuring the PTO switch is in the "OFF" position. Insert a flat feeler gauge into each of the three slots in the armature housing, and adjust the clearance between the armature plate and rotor to 0.012 to 0.014 inches (0.30 to 0.35 mm) by loosening or tightening the three lock nuts. p. 8
How do I adjust the variator belt on a John Deere 216 tractor?
If the primary belt jumps the variator sheave when the clutch pedal is depressed, the distance between the variator and primary belt guide should be checked. This distance should not exceed 1/8 inch (3.175 mm). p. 25
How do I reset the PTO on John Deere 200 series with an electric PTO?
To adjust the electric PTO clutch, disconnect the engine spark plug wire and remove the key from the ignition switch, ensuring the PTO switch is in the "OFF" position. Insert a flat feeler gauge into each of the three slots in the armature housing, and adjust the clearance between the armature plate and rotor to 0.012 to 0.014 inches (0.30 to 0.35 mm) by loosening or tightening the three lock nuts. p. 8
How quickly can I access this manual after buying?
Instant PDF download. You get the full 88-page searchable Service Manual immediately after payment. Open it on your laptop, tablet, or phone right in the shop.
Is this John Deere 200 & variants Service Manual printable?
Yes. Print individual pages or full chapters for your own shop use, on letter or A4 paper.







Reviews
There are no reviews yet.