
Part of the John Deere Repair Manuals.
Coverage first: Technical Manual TM1344 serves the John Deere 7200 and 7300 MaxEmerge 2 planter family plus the 7240 and 7340 variants, and this John Deere 7200 MaxEmerge 2 technical manual PDF runs 512 pages of factory service data for vacuum, plateless, and plate metering machines alike. Hydraulics claim close to half the book: schematics trace oil through the marker sequence valve, wing-fold and vertical-fold cylinders, and the QUIK-FILL dry fertilizer motor, with rephasing procedures for your lift cylinders. Seed drive transmission, clutch, and finger pickup rebuilds carry through to run-in bench checks and population verification. On reassembly, hold gauge wheel tire to blade clearance at 1.5 mm (1/16 in.), and retire a vacuum seed disk once seal wear around the perimeter passes 1.0 mm (3/64 in.). Bookmarked and keyword-searchable, this PDF gives you the answer while the planting window is still open.
What's Inside This John Deere 7200, 7300 MaxEmerge 2 (7240, 7340) Manual
| System | Pages | Key Topics |
|---|---|---|
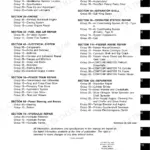
| General | 5-50 | Safety, Specifications, Predelivery, Delivery, And After-Sale Services, Lubrication |
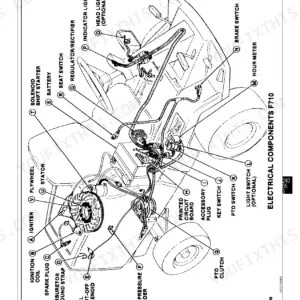
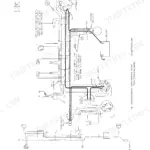
| Electrical | 51-54 | Warning Lamp, 7-Pin Connector Pinout, Wiring Harness Location |
| Hydraulic Specifications and Operation | 55-106 | Essential Tools, Rotary Marker Sequence Valve, Raise/Lower Implement, Vacuum Level |
| Master Cylinder and Wheel Cylinders | 107-152 | Master Cylinder, Wheel Cylinders, Rephasing Cylinders, 7240/7340 Wheel Cylinder Variants, 7300/7340 Lift Assist Wheel Systems, Hydraulic Marker Systems |
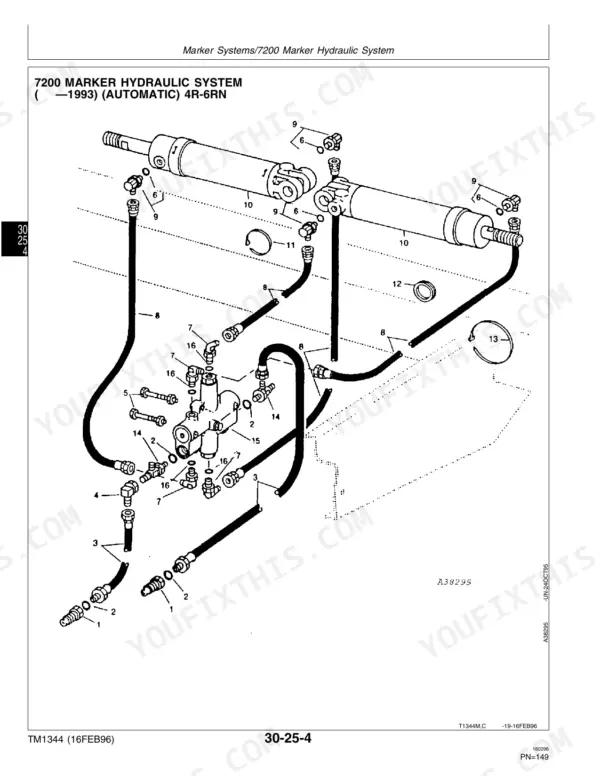
| Marker Systems | 153-206 | Marker Hydraulic Systems (7200/7240/7300/7340), Marker Actuator, Marker Cables, Wyr-Loc Cylinder |
| Wing-Fold and Vertical-Fold Cylinders | 207-238 | 7200 Wing-Fold Cylinders, 7300 Vertical-Fold Cylinders, 7300 Stack-Fold Folding Cylinders |
| Dry Fertilizer Hydraulic System | 239-282 | Quik-Fill Hydraulic System, Hydraulic Motor, Shutoff Valve, Flow Control Valve |
| Drives | 283-400 | Specifications, Drive Wheels, Countershaft, Drillshaft and Jackshaft, Seed Drive Transmission, Clutch, Fertilizer Drive, Liquid Fertilizer Pumps |
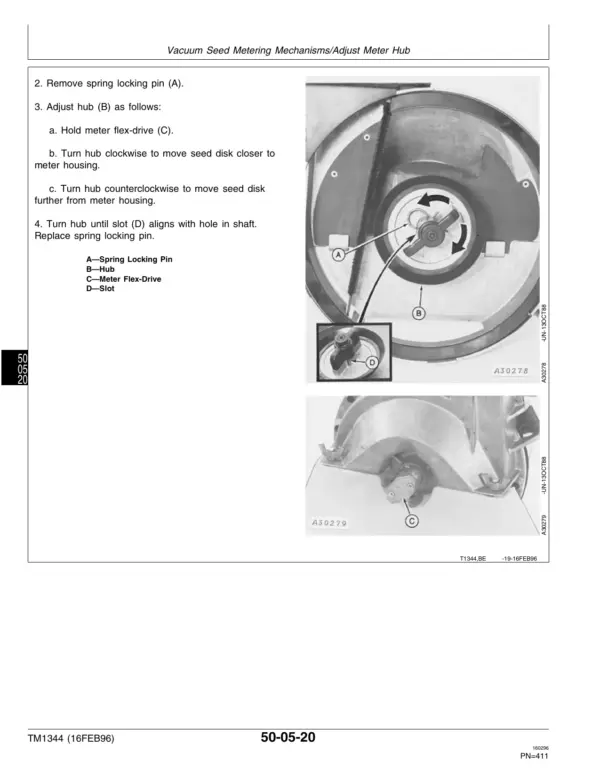
| Planting Units | 401-484 | Vacuum Seed Metering Mechanisms, Plateless Seed Metering Mechanisms, Plate Seed Metering Mechanisms, Seed Openers, Closing Wheels, Insecticide/Herbicide Meter |
| Planter Run-In | 485-504 | Run-In Motor, Gearbox, Seed Meter, Seed Plate Meters, Finger Pickup, Feed Cup Meter |
| Check Seed Population | 505-512 | General Information |
Quick Reference Specifications
| Specification | Value | Page |
|---|---|---|
| All Models | ||
| Minimum pressure to cycle marker spool | 724 kPa (105 psi) | p. 69 |
| Master Cylinder Tie Bolt Torque (Final) | 244 to 271 N·m (180 to 200 lb-ft) | p. 119 |
| PTO Pump Torque (Four Large Bolts) | 61 N·m (45 lb-ft) | p. 261 |
| PTO Pump Torque (Four Small Bolts) | 34 N·m (25 lb-ft) | p. 261 |
| PTO Pump Torque (Four Socket Head Bolts) | 27 N·m (20 lb-ft) | p. 261 |
| Vacuum Pump Shaft Nut Torque | 19 N·m (14 lb-ft) | p. 271 |
| Wear around the perimeter of the disk caused by the vacuum seal | 1.0 mm (3/64 in.) | p. 406 |
| Regular (long) brush length | 7-1/2 inches | p. 427 |
| Short brush length | 5-3/4 inches | p. 427 |
| Effective drive wheel circumference | 96 inches | p. 459 |
| Gauge wheel tire to blade clearance | 1.5 mm (1/16 in.) | p. 462 |
| Blade edge contact | 38 mm (1-1/2 in.) to 64 mm (2-1/2 in.) | p. 462 |
| Coulter bearing drag torque | 1.1 to 2.8 N·m (10 to 25 lb-in.) | p. 475 |
| Single-disk fertilizer opener bearing drag torque | 1.6 to 2.8 N·m (14 to 25 lb-in.) | p. 476 |
| 7300 | ||
| Stack-Fold Cylinder Lock Nut Torque | 922 N·m (680 lb-ft) | p. 237 |
| Stack-Fold Cylinder Tie Rod Nut Torque | 203 N·m (150 lb-ft) | p. 237 |
| 7240 | ||
| 7240 Marker Hydraulic System supply hose length (Automatic Marker System) | 3854 mm (151-3/4 in.) | p. 174 |
| 7340 | ||
| 7340 Narrow Row Lift Assist rod end hose length (at 952 mm/37.5 in. wheel offset) | 3886 mm (153 in.) | p. 142 |
John Deere 7200, 7300 MaxEmerge 2 (7240, 7340) Common Problems This Manual Covers
John Deere 7200 planter runs uneven, one side digs deep while other row units barely touch
Cycle the lift circuit fully up and hold the lever to rephase the wheel cylinders. If one side still drops, inspect the wheel cylinder for leaks: check the rod and barrel assembly for burrs, damage, or scored conditions that could cause leakage, and check the O-ring, back-up washer, wiper seal, and retaining ring for damage, per page 145. When rebuilding the master cylinder, torque the tie bolts to 244-271 N·m (180-200 lb-ft).
Manual Section: Master Cylinder and Wheel Cylinders p. 119Marker arms raise out of sequence or operate backwards after rehitching to a different tractor
Check hose routing against the marker hydraulic schematic first; crossed lines reverse the sequence. Then test the rotary marker sequence valve with the troubleshooting steps on page 69. The spool needs at least 724 kPa (105 psi) to cycle, so verify tractor remote pressure before tearing the valve apart.
Manual Section: Hydraulic Specifications and Operation p. 69Vacuum meter skips and doubles mid-season, seed spacing suddenly erratic on several rows
Pull the meters and inspect each seed disk; replace any disk showing more than 1.0 mm (3/64 in.) of wear around the perimeter from the vacuum seal, the spec on page 406. Measure the brushes too and replace regular brushes worn under 7-1/2 inches, per page 427. Test rebuilt meters on a stand before planting.
Manual Section: Planting Units p. 406Row units cut uneven seed depth, gauge wheels wobble and openers leave a W-shaped trench
Adjust each gauge wheel so the tire lightly contacts the opener blade with 1.5 mm (1/16 in.) clearance, following page 462. Then check blade edge contact; add or remove hardened washers behind the blade bearings to get 38 mm (1-1/2 in.) to 64 mm (2-1/2 in.) of contact, per page 462. Replace worn gauge wheel arm bushings while the unit is apart.
Manual Section: Planting Units p. 462Closing wheels wander off the trench centerline and leave the seed slot open
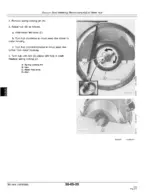
Raise the planter, loosen cap screw (B), then turn adjusting cam (C) half a turn clockwise or counterclockwise to walk the closing wheels toward center over the trench; visually recenter as required. Make sure the top front edge of the wheel frame contacts the support casting evenly across its full width so both wheels apply the same force; if it doesn't, loosen bolt (E) and slide the cam and bolt in their slot before retightening, per page 469. If the wheels are still firming soil unevenly after centering, also check the down-force handle position (slots A-D vary closing force; the middle slot lets the wheels float), per page 467.
Manual Section: Planting Units p. 469Frequently Asked Questions
What are the torque specifications for bolts on the John Deere 7300 planter?
The manual provides torque values for various bolt sizes and grades in the 'Unified Inch Bolt and Cap Screw Torque Values' and 'Metric Bolt and Cap Screw Torque Values' tables. For example, a Grade 5, 1/2-inch bolt has a dry torque of 110 lb-ft, while a Class 10.9, M12 bolt has a dry torque of 140 N·m. p. 19
What are the replacement specifications for disc openers on the John Deere 7200 planter?
To maintain proper performance, check blade edge contact. Add or remove hardened washers behind blade bearings to obtain 38 mm (1-1/2 in.) to 64 mm (2-1/2 in.) of blade edge contact at the contact point. p. 462
How often should the anti-friction bearings on the drive wheels be inspected and repacked?
The anti-friction bearings should be inspected and adjusted every 100 hours. Every 200 hours, or before each planting season, whichever comes first, the bearings should be disassembled, cleaned, and repacked with John Deere Multi-Purpose Lubricant or an equivalent SAE multipurpose-type grease. p. 302
What is the procedure for setting the vacuum level for corn on the John Deere 7200 planter?
To set the vacuum level, push the SCV lever to the forward detent to start the blower and let the oil warm up for 15 minutes. After filling the hoppers and driving approximately 10 meters (35 feet) to fill the seed cells, adjust the control knob until the vacuum gauge indicator points to the vacuum level listed for the specific seed size in the provided chart. p. 74
What is the torque specification for the vacuum pump shaft nut on the John Deere 7200 planter?
The torque specification for the vacuum pump shaft nut is 19 N·m (14 lb-ft). p. 271
How will I receive this John Deere 7200 Technical Manual?
You get a 512-page searchable PDF that downloads instantly after checkout. Open it on your laptop, tablet, or phone, and bring it right to the shop floor.
Does this John Deere 7200 manual allow printing?
You can. Print the sections you want for your own use and keep the file as your backup.






Reviews
There are no reviews yet.